Drupal on Ubuntu
This guide walks you through setting up a Drupal development environment using Ubuntu and NetBeans. This setup will allow you to do step through debugging and profiling of your Drupal sites.
See also:
Install Ubuntu
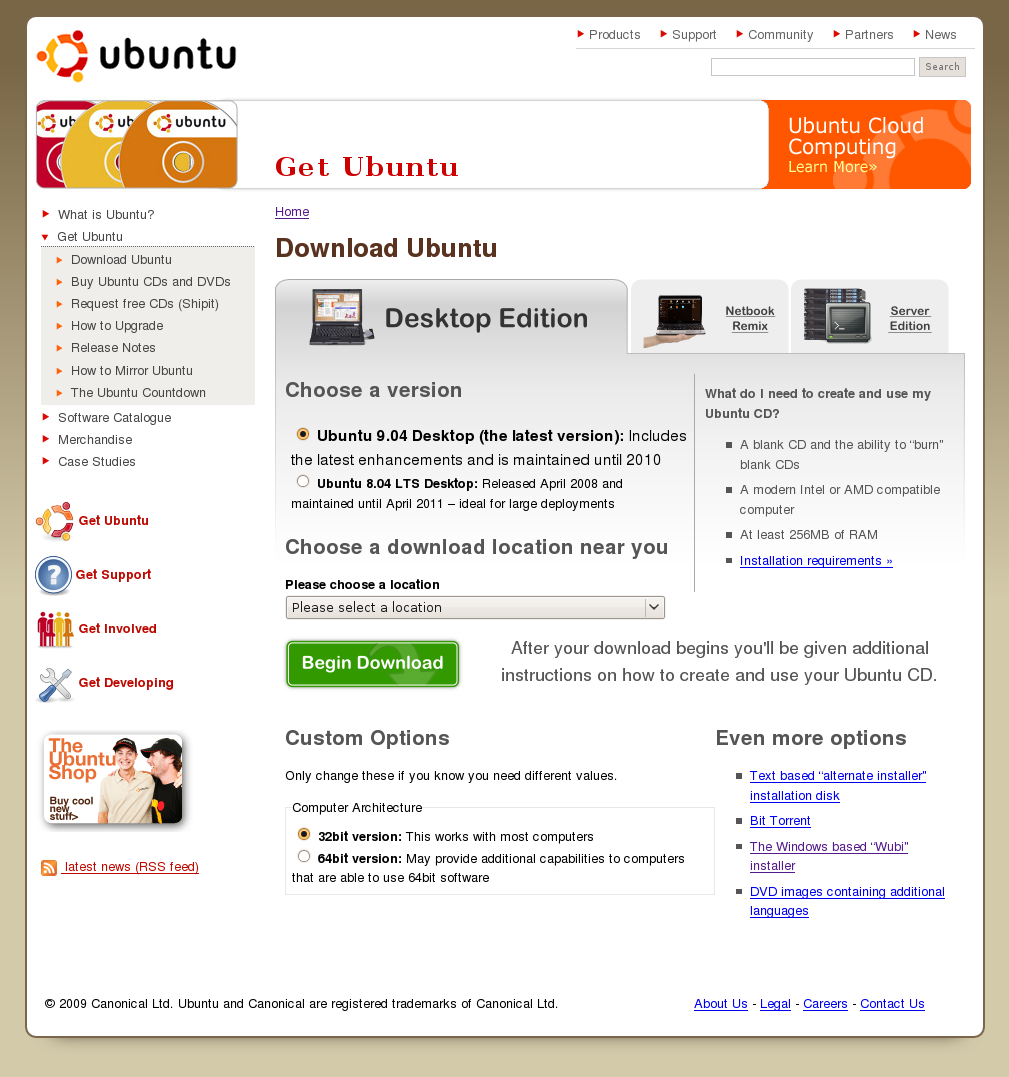
Download the latest desktop CD image from ubuntu.com and burn it to a CD. Use the CD to boot your development machine and install Ubuntu. This guide assumes that Ubuntu will be the only operating system on your machine. Please see the Ubuntu documentation if you want to run Ubuntu alongside an existing Windows installation.
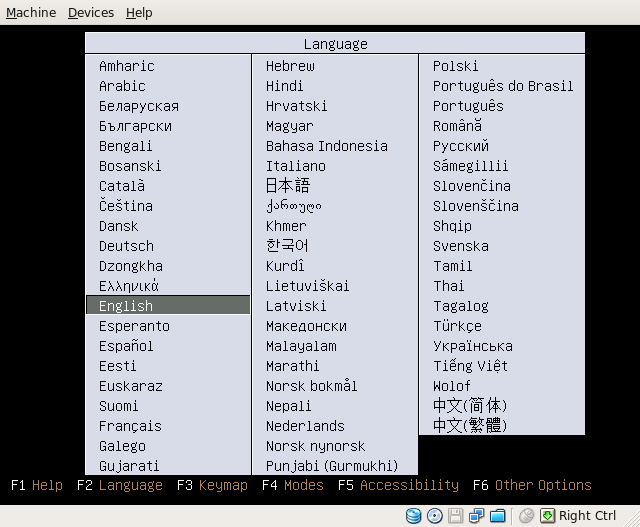
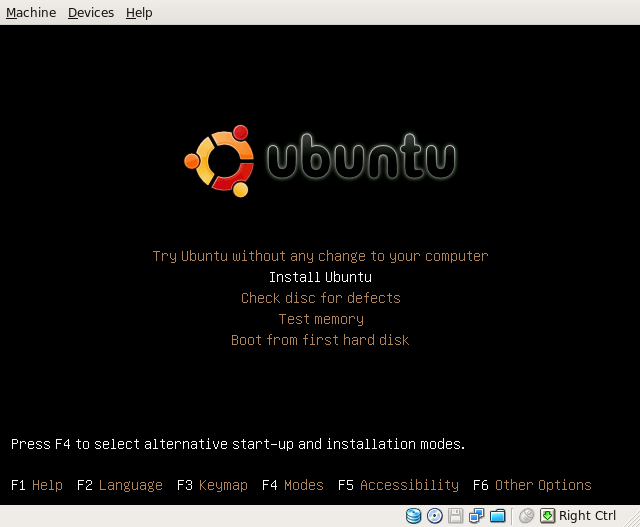
When the installer has finished booting, the first thing you’ll have to do is to choose a language for the installer. This choice only affects the very first part of the installation process. If you are using a non-US keyboard, you can press F3 to select another keymap (this is usually not necessary since you’ll get to choose a keymap in the main installer).

For now, just use the arrow keys to select Install Ubuntu and press enter. Now is the time to go get the first of many cups of coffee, while you wait for the main installer to load.
The first step of the installation process is to choose the language to use during installation. The chosen language will also be the default language for the final system.

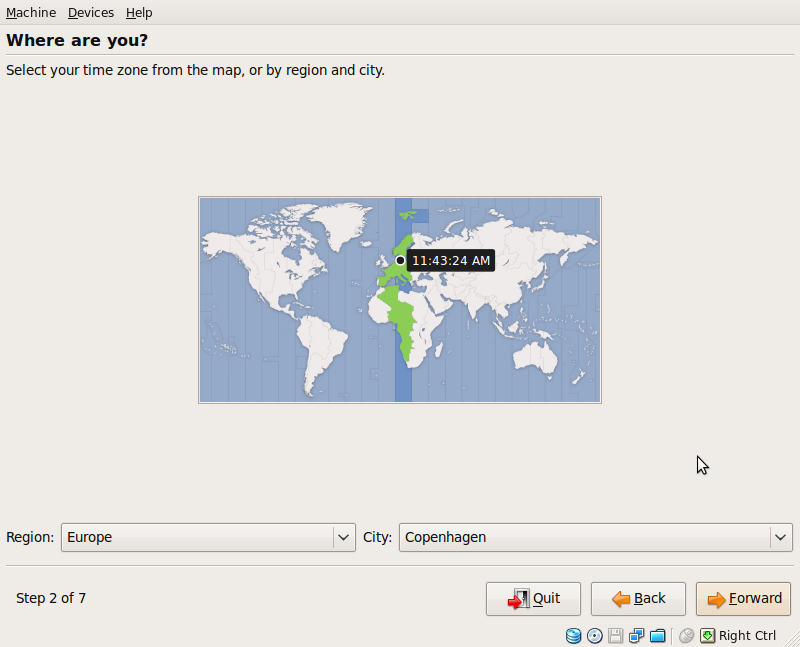
Next, you should select your current timezone. This information will be used to set the correct time and date.
The final localization step involves choosing your keyboard layout. In most cases the installer can figure it out on its own, but you have the opportunity to override the default choice. This step of the installer also has a text field, which you can use to make sure you have chosen the correct layout.

Then it’s time to prepare the hard disk for Ubuntu. Since Ubuntu will be the only operating system on this machine, we choose the option Use the entire disk. This will erase all existing data on the hard disk!

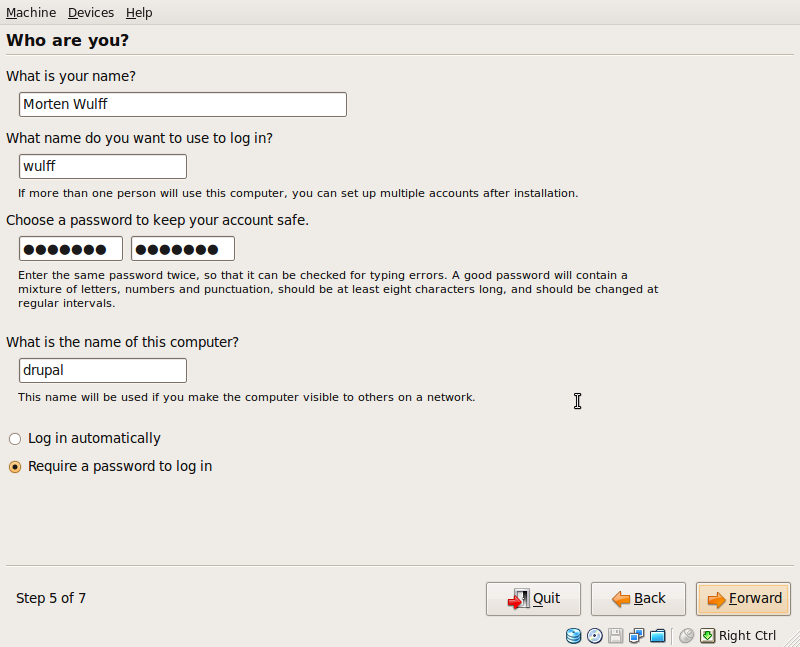
Next, you must provide the necessary information for the installer to create an account for you. Enter your full name and (optionally) choose the username you want to use to log in, and a password. Finally, choose a name for the computer. In this guide, we’ll just go with drupal, but you’re free to choose any name you like.
The installer then displays a summary of your choices, and if you like what you see, you can start the installation process. Now would be a good time to get a second cup of coffee.

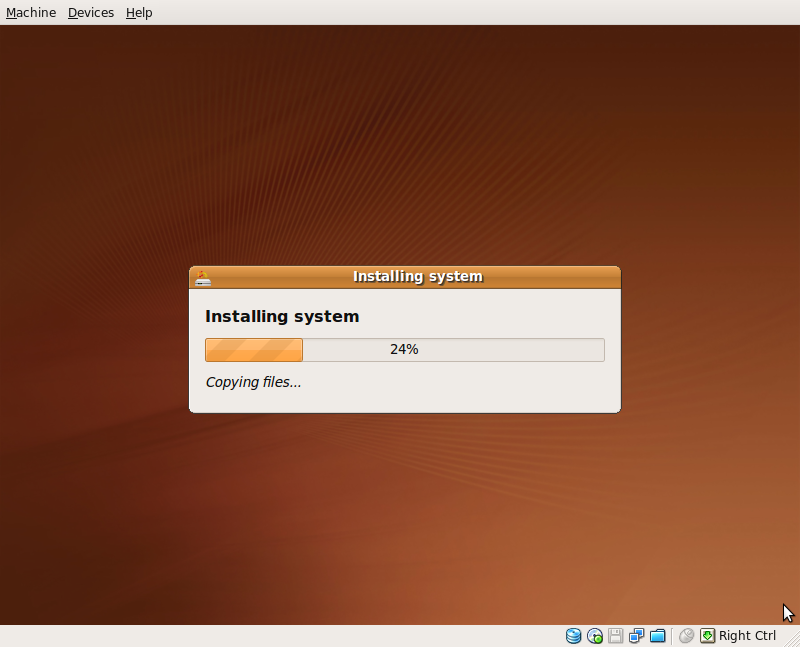
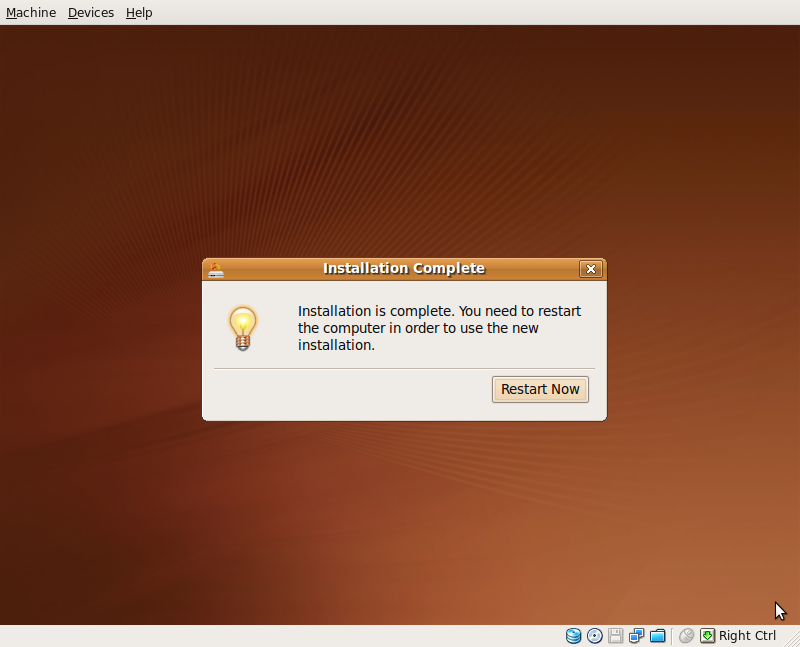
When the installation process finishes, you will be asked to remove the CD and restart the machine. Once the machine restarts, you are ready to log in to your new Ubuntu system with the username and password you chose during installation.

Install Apache, MySQL, and PHP
When the Ubuntu install is finished and any available updates have been installed, it’s time to install the server software required to run Drupal.
Open a terminal window (Applications → Accessories → Terminal) and run the following command to install Apache, MySQL and PHP:
sudo apt-get install lamp-server^When sudo asks for a password, simply enter the password you used to log in to the system.
Apt-get displays a list of the packages which are about to be installed. Answer yes or press enter to start the installation. Apt-get will then download and install the required packages. (See the screenshot “Continue” below.)

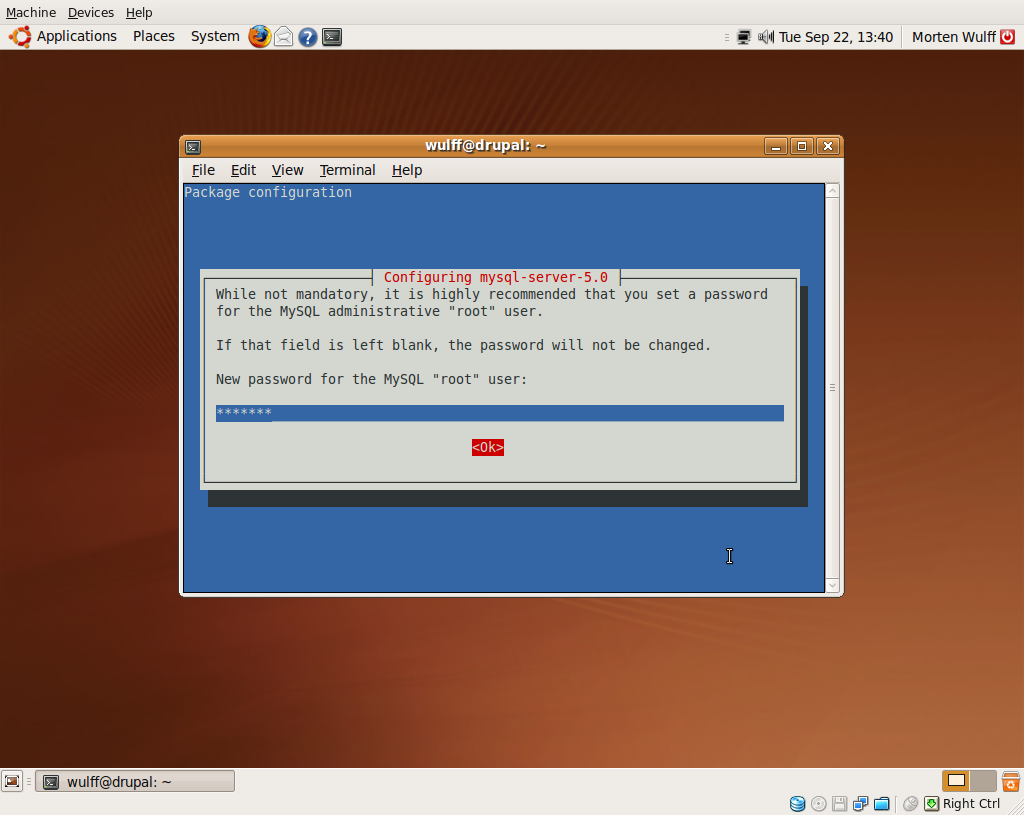
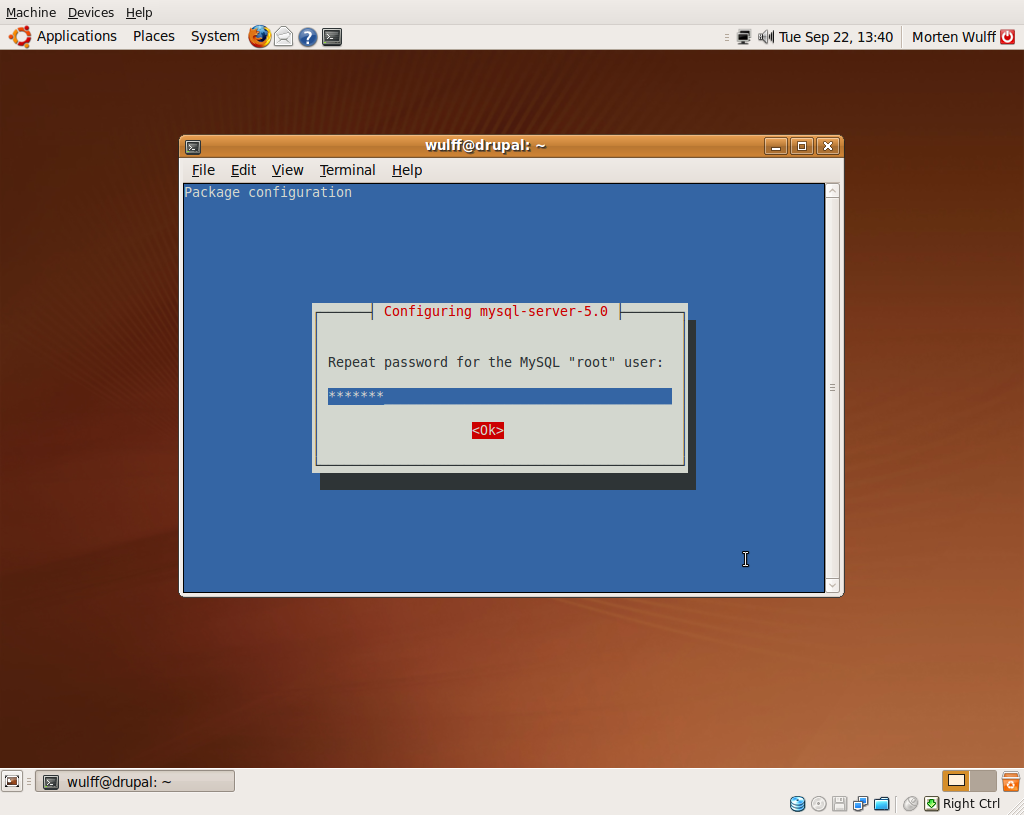
As part of the installation process, you will be asked for a password for the MySQL root user. You will need this password to configure the database server later. (See the screenshot “MySQL password” below.)
Install additional software
Open a terminal window and run the following command to install the rest of the packages required to run Drupal and NetBeans:
(On Ubuntu 10.04 you need to enable the Partner repository to install the Java Development Kit: Go to System → Administration → Software sources. Click the Other software tab and enable the lucid partner repository. Click Close and then Reload to rebuild the list of available software.)
sudo apt-get install php5-cli php5-gd php5-xdebug sun-java6-jdkThis command installs the following packages:
- php5-cli The PHP command-line interpreter
- php5-gd GD support for PHP
- php5-xdebug Xdebug support for PHP
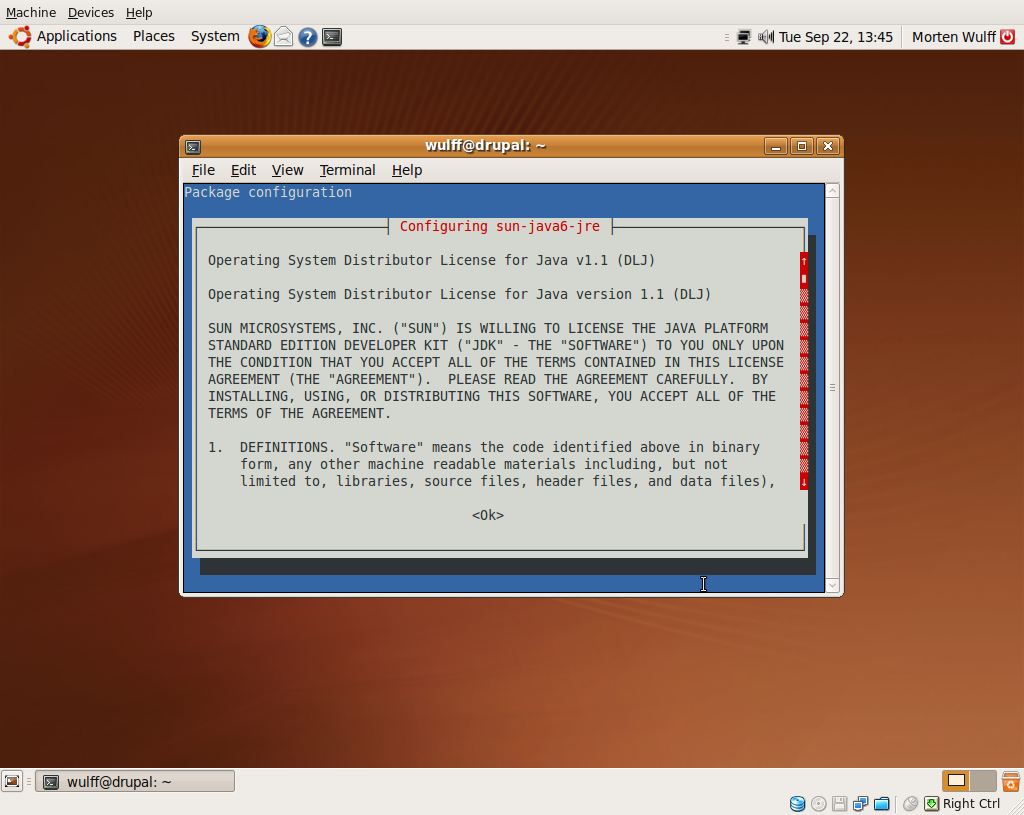
- sun-java6-jdk The Sun Java™ Development Kit
As part of the installation process, you must accept the Java license agreement.

Note that this version of php5-gd uses the system GD library which doesn’t include all the functions which are included in the version of GD which is bundled with PHP. This means that functions like imagefilter() and imagerotate() will not be available. If you need access to these function, you can follow this guide to compile your own version of the php5-gd package.
PHP
Open a terminal window and run the following command to edit the main PHP configuration file (this is not necessary on 10.04):
sudo vi /etc/php5/apache2/php.iniFind the setting memory_limit and change it from 16M to 128M.
Configure Apache
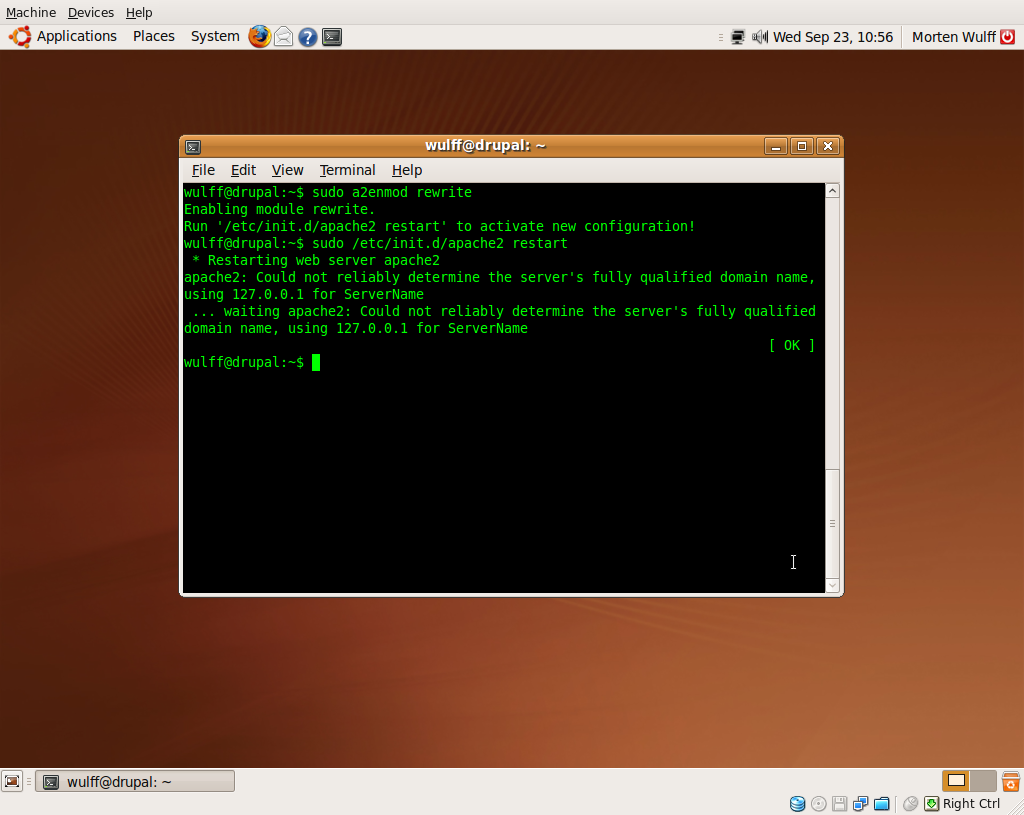
In order to use clean URLs in Drupal, you must enable the Apache rewrite module. Open a terminal window and run the following command:
sudo a2enmod rewriteWhen the module has been enabled, you must restart Apache:
sudo /etc/init.d/apache2 restartApache will complain that it can’t determine the server’s fully qualified hostname. You can safely ignore this error message.
If you want to get rid of the error message, create a file called servername in the /etc/apache2/conf.d directory. Put the following line in the file:
ServerName drupalReplace drupal with the hostname you chose for you machine during the Ubuntu installation process.
Configure MySQL
Next you must create a user in the MySQL database. This user will be used to access all your local Drupal databases. Open a terminal window and start the MySQL client (you will be asked to enter the password you chose when you installed MySQL):
mysql -u root -pThe command tells the MySQL client that you want to log in as the root user and that you want to be prompted for a password.
When you have logged in to the client, you can run the following commands to create a local drupal user and exit the MySQL client:
CREATE USER drupal@localhost IDENTIFIED BY 'drupal';
FLUSH PRIVILEGES;
EXIT
You can run the following command to make sure that the new user can log in:
mysql -udrupal -pdrupalThe user doesn’t have access to any databases yet. We will grant it database privileges when we set up the local Drupal sites.

Install NetBeans
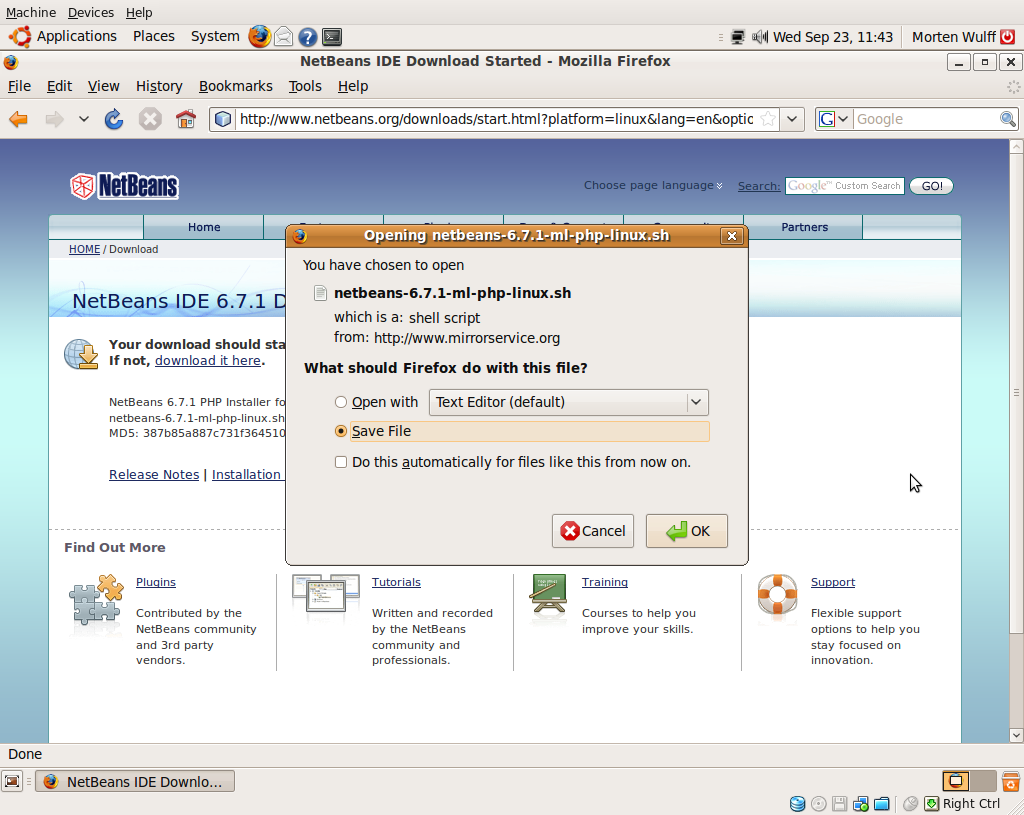
Go to the NetBeans download page and download the PHP package. Save the file on the desktop.

Open a terminal window and run the following command:
sudo sh Desktop/netbeans-6.7.1-ml-php-linux.sh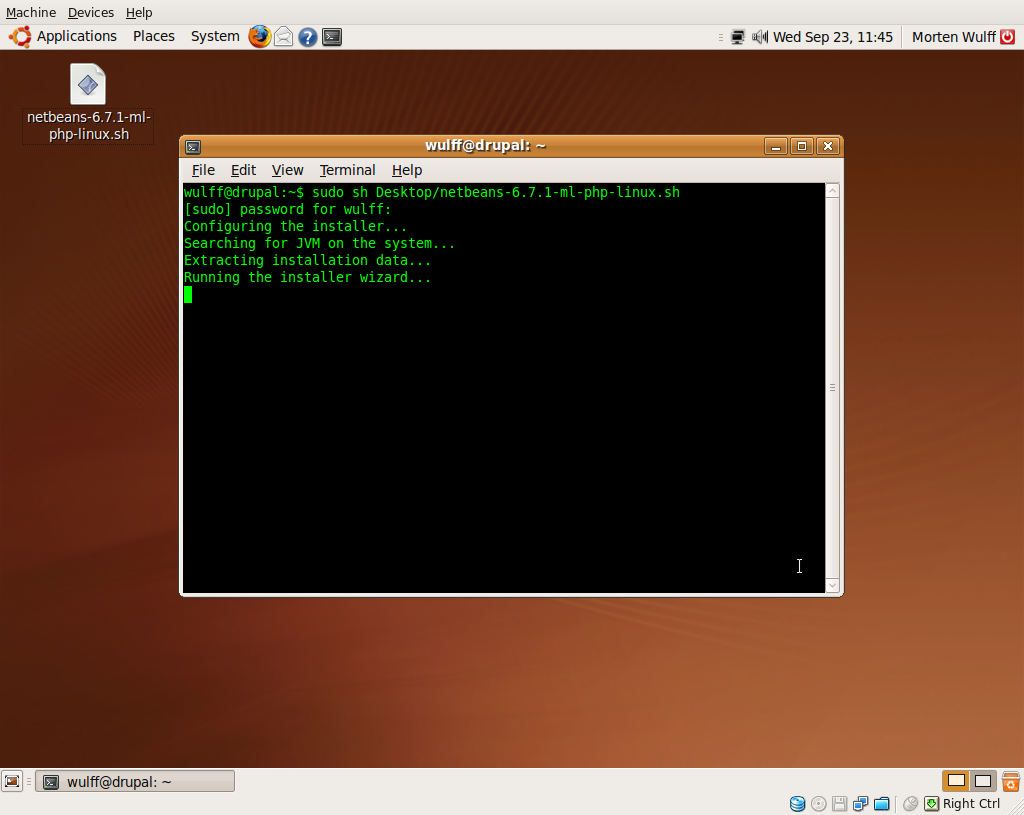
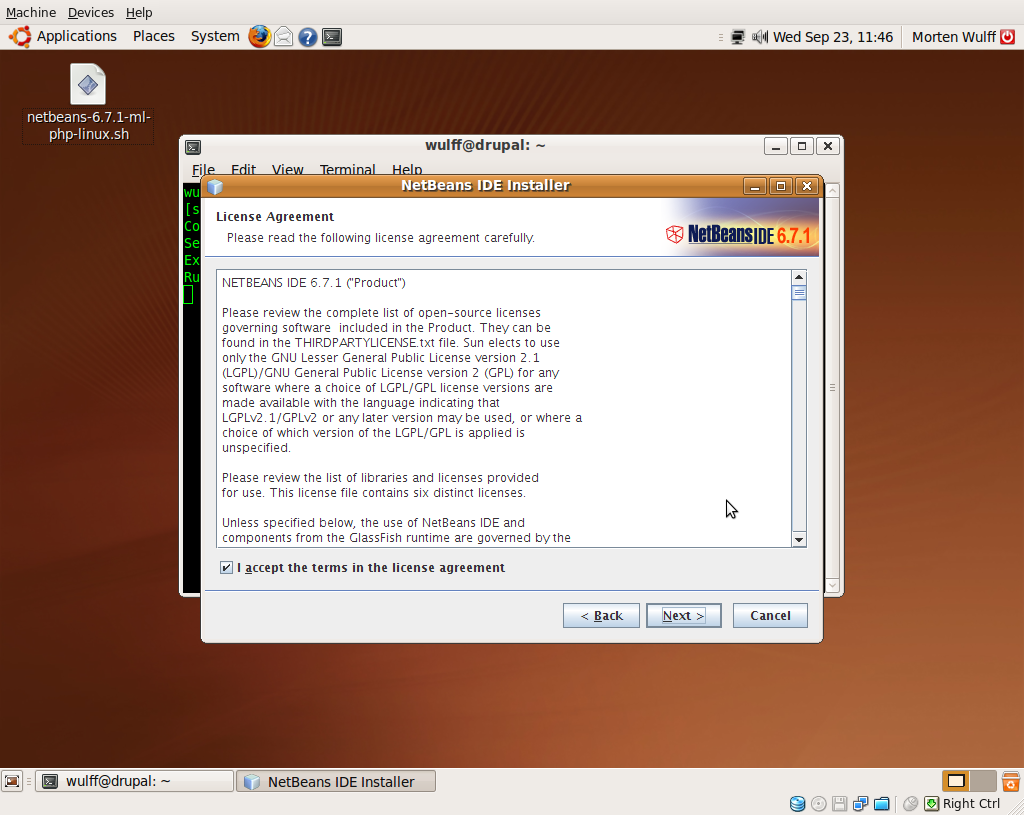
After unpacking the installer you will be presented with the first step of the installation wizard.

Click next to continue to the license agreement. Accept the license agreement and click next.
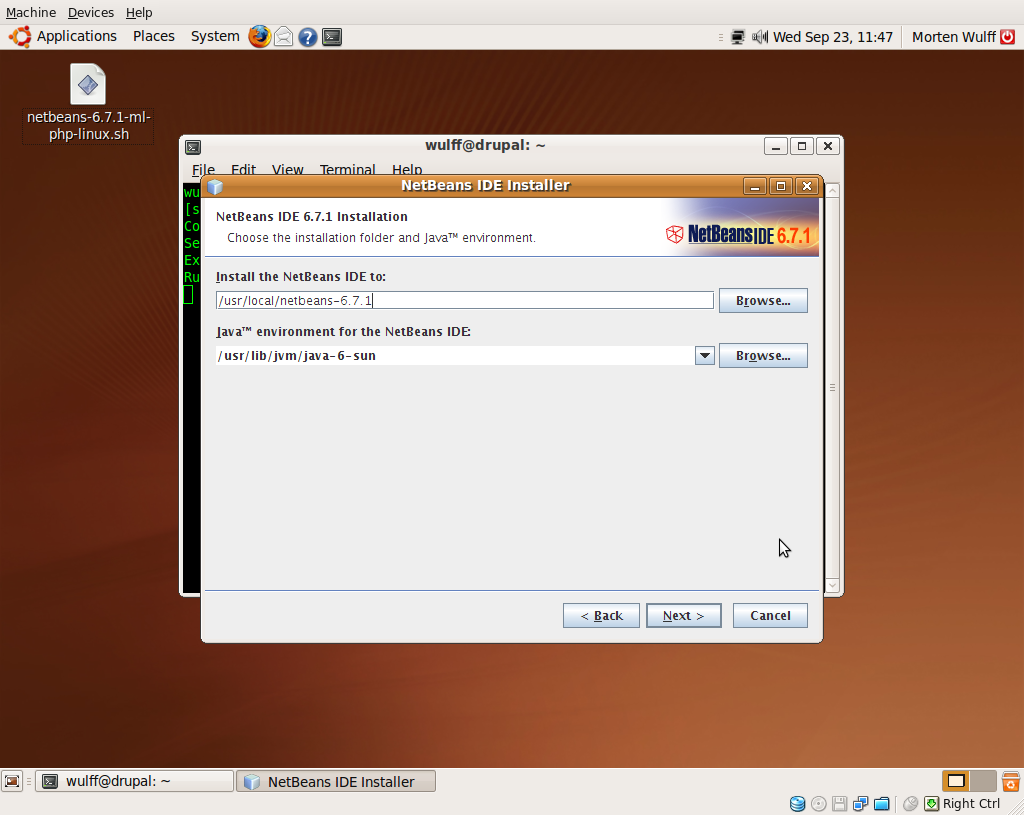
Next, you can choose which folder to install NetBeans in. In most cases, the default folder is fine, so you can just click next.
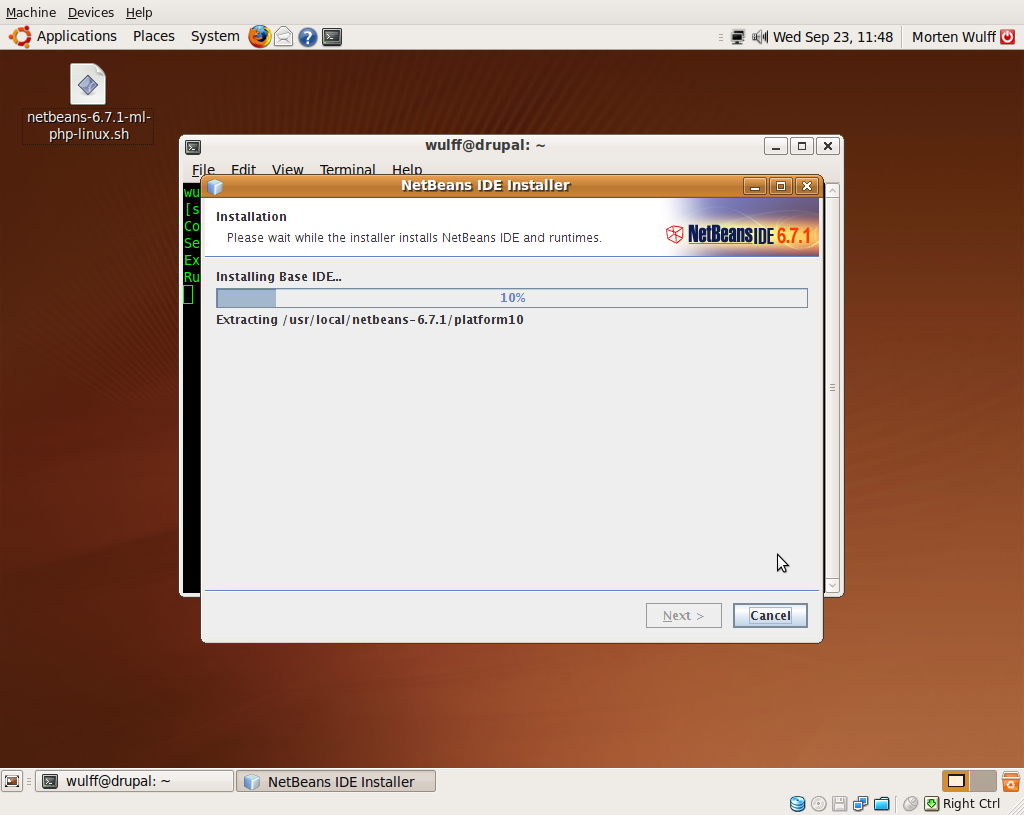
Finally, you will be presented with a summary of your choices. If everything looks OK, click Install to start the installation process.

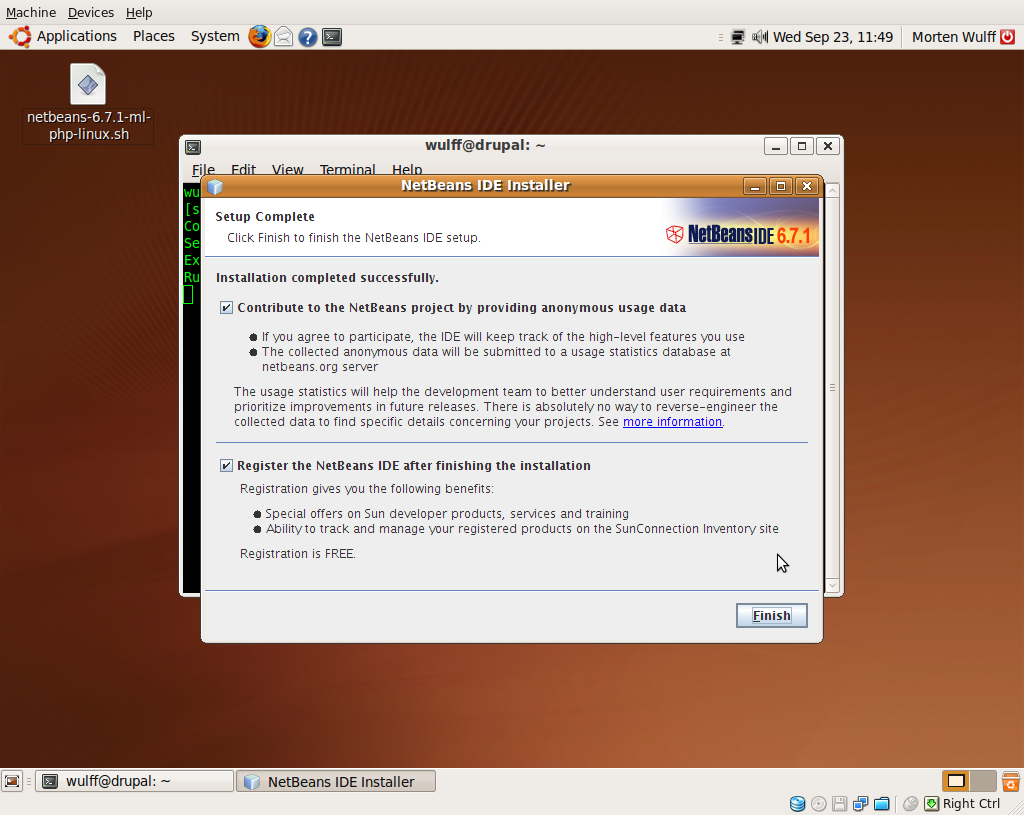
Finally you have the option to provide usage data and register NetBeans. None of them are required. Click Finish to exit the installer.
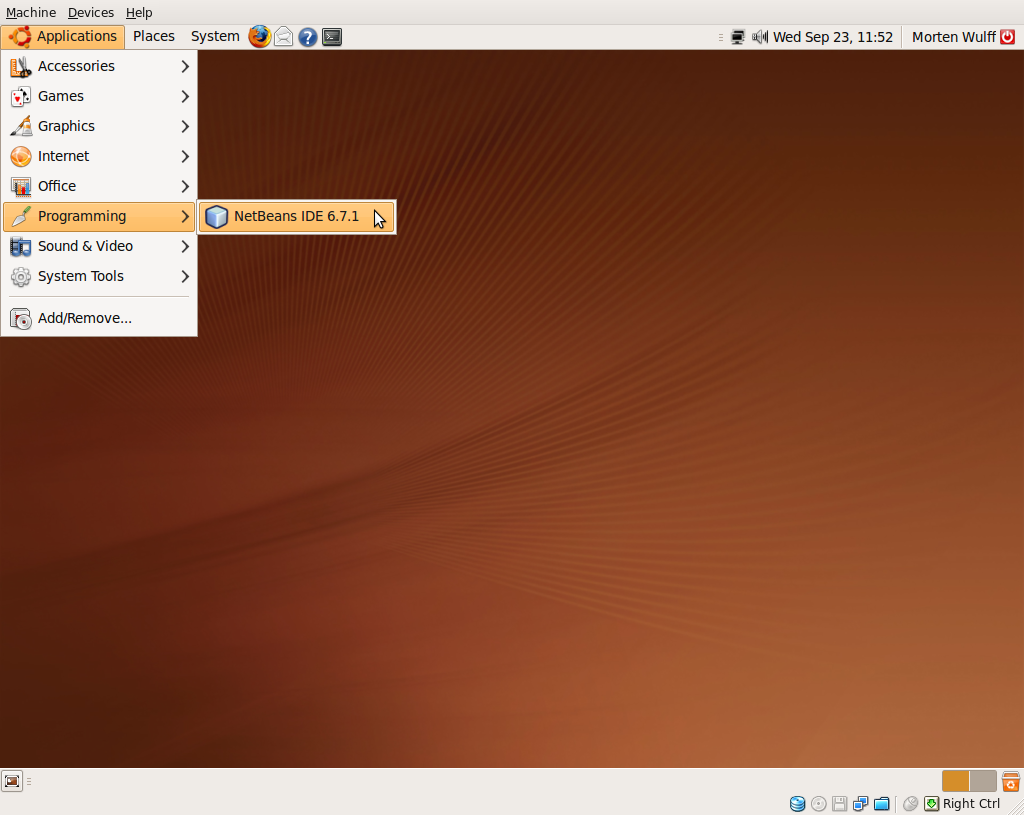
NetBeans is now available in your Applications menu and you can delete the installation file from your desktop.
Update NetBeans
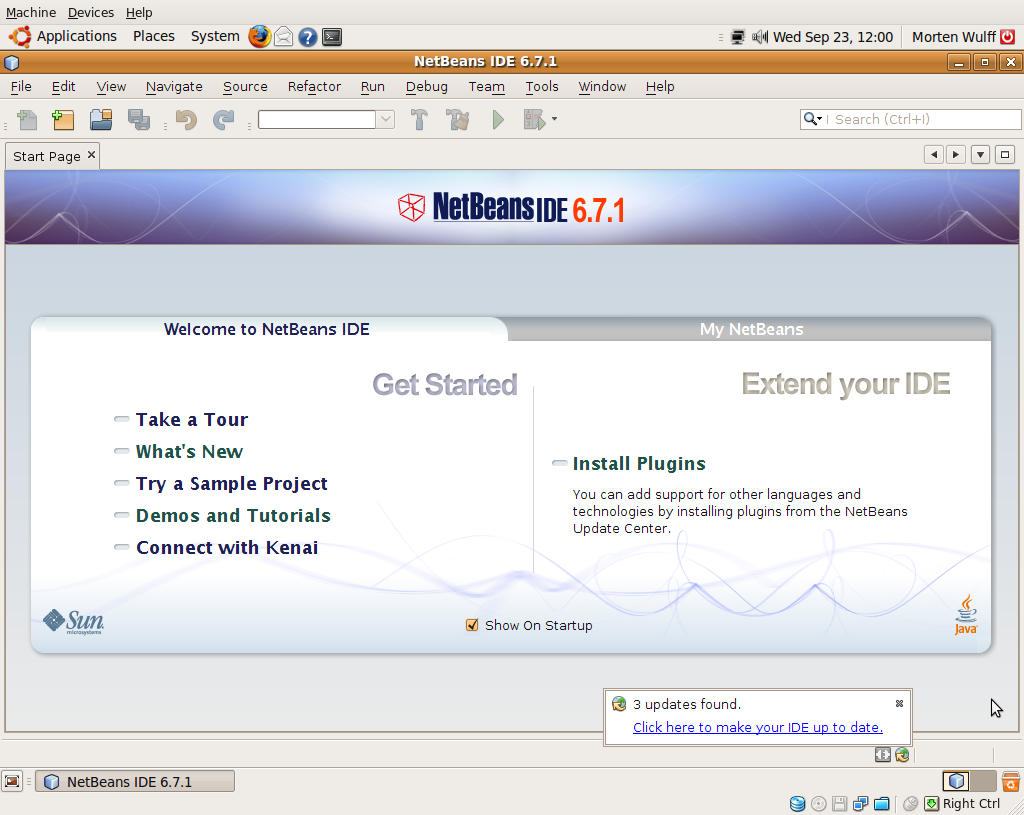
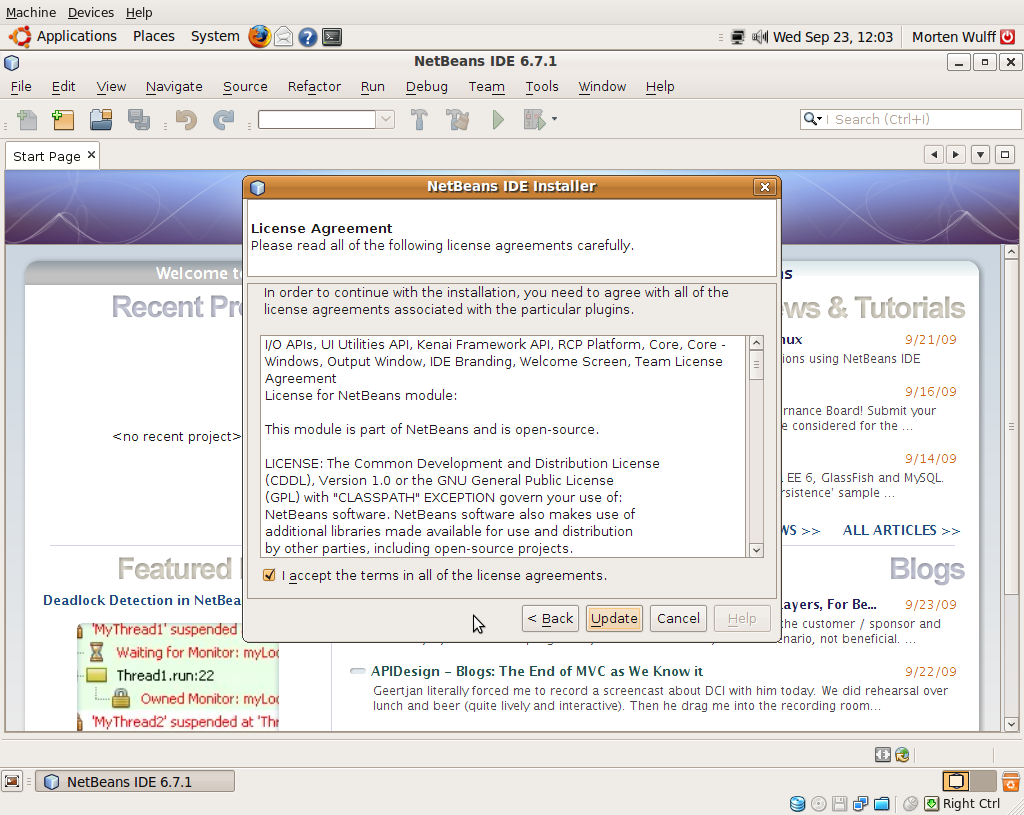
The first time you start NetBeans, you should install any available updates. Click the update icon in the status bar to get started.

 When the updates have been installed, you will have to restart NetBeans.

Configure NetBeans
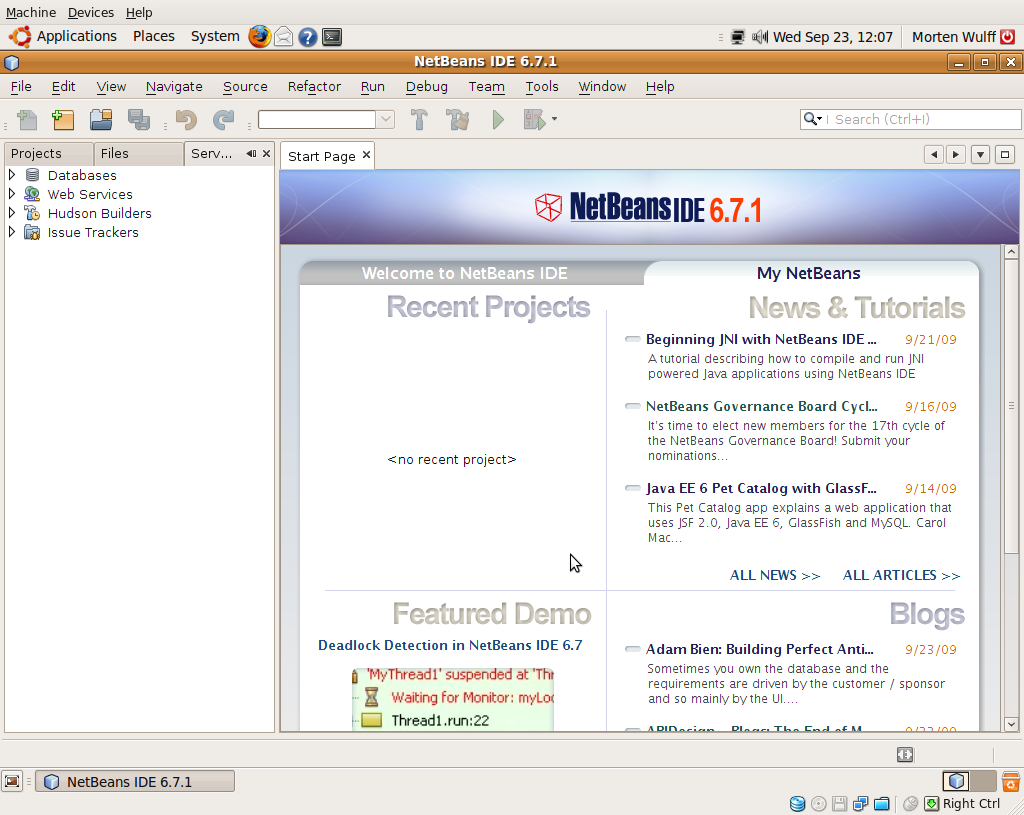
When you start NetBeans, you will be presented with a start page which shows NetBeans related news and blog posts. Uncheck “Show On Startup” if you do not wish to see this page every time you launch NetBeans. You can always access the start page from the Help menu.
Basic configuration
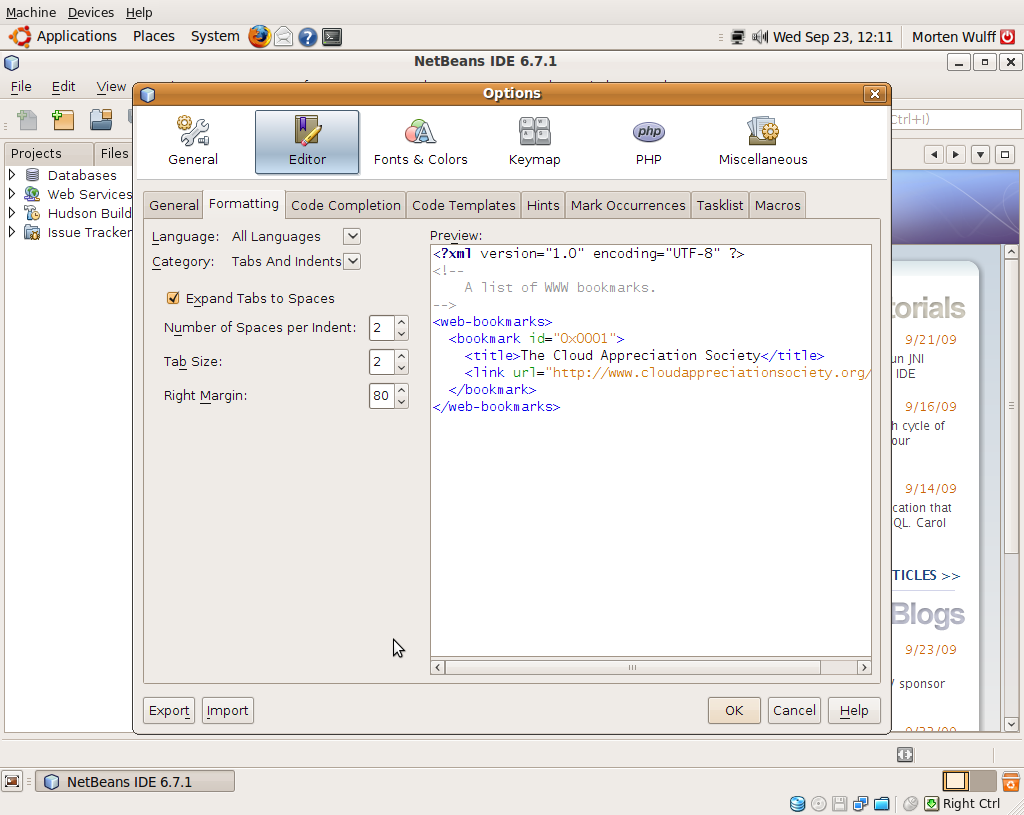
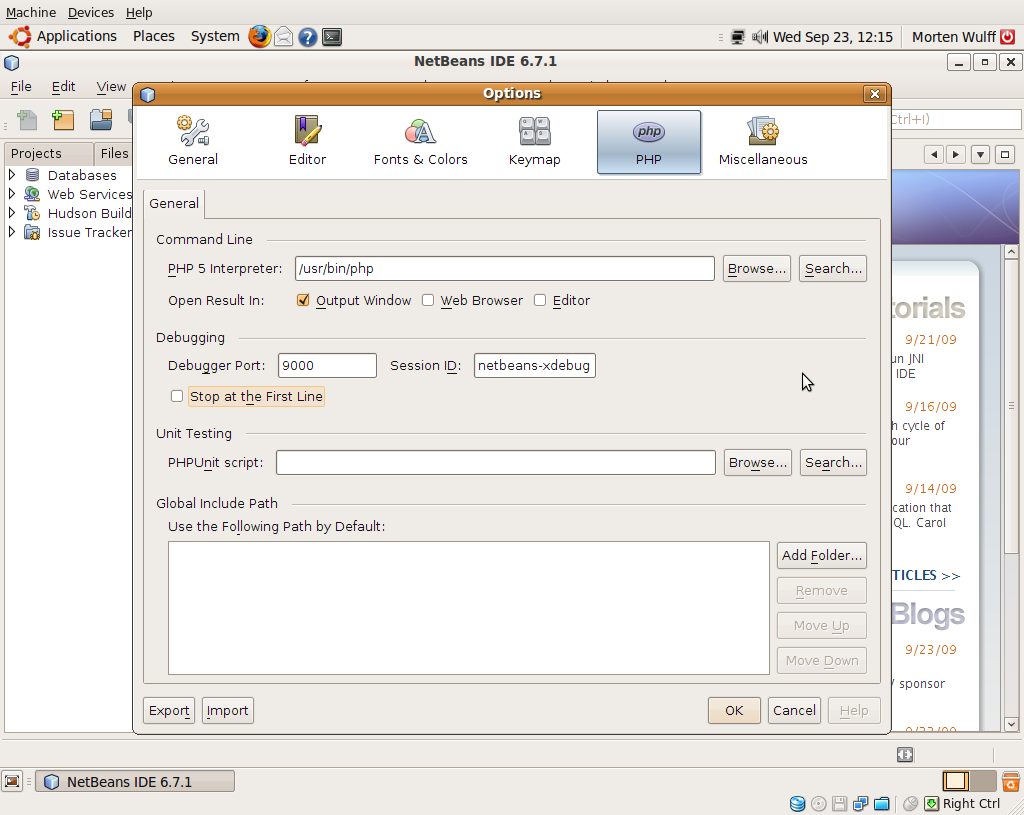
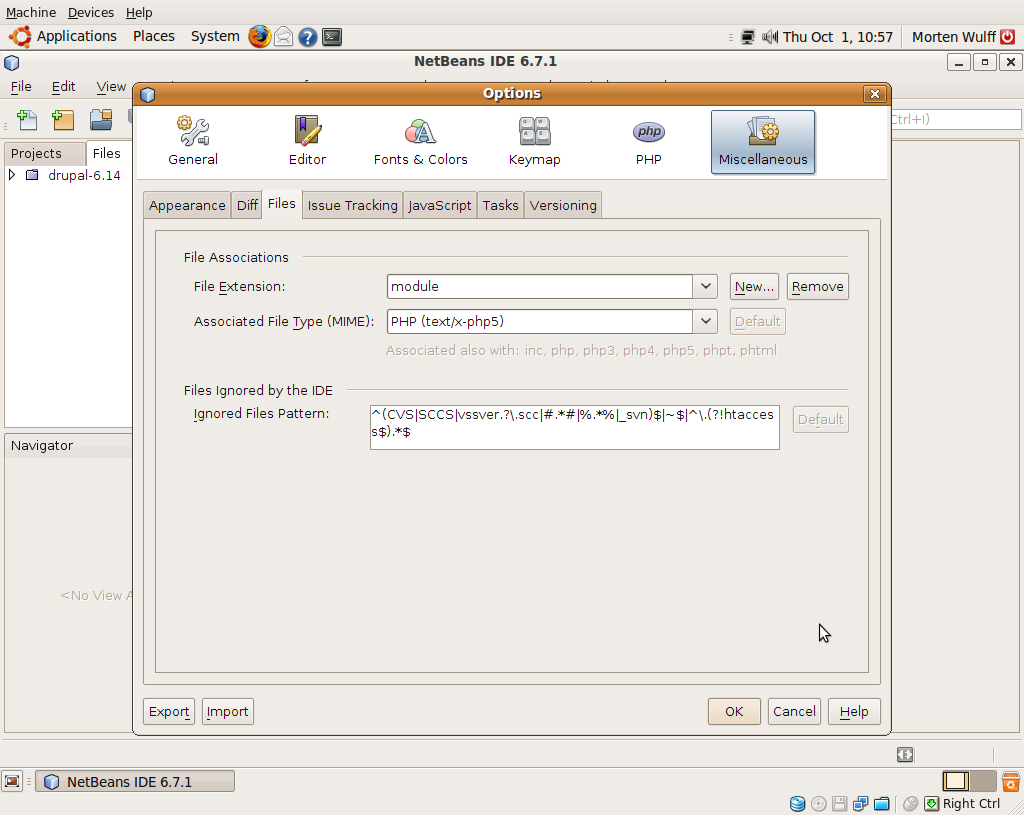
Go to Tools → Options to configure the global settings. Make the following changes on these tabs:
- Editor On the Formatting sub-tab set Number of Spaces per Indent to 2 and Tab Size to 2 to match the Drupal code style guidelines.
- PHP Uncheck the box Stop at the First Line.
- Miscellaneous On the Files tab you must add a couple of non-standard file extensions used by Drupal. Click New and add the following extensions: install, module, and profile. Set the file type of each extension to PHP (text/x-php5). This enables Find usages and code completion across all Drupal source files.

Database connection
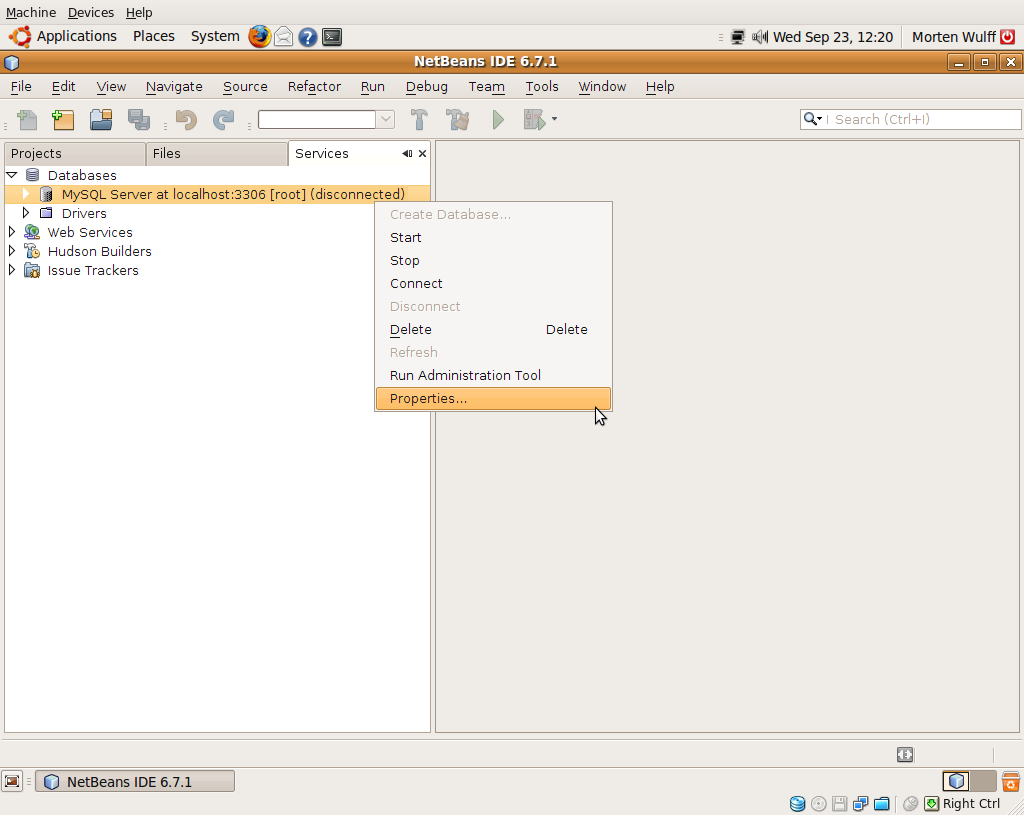
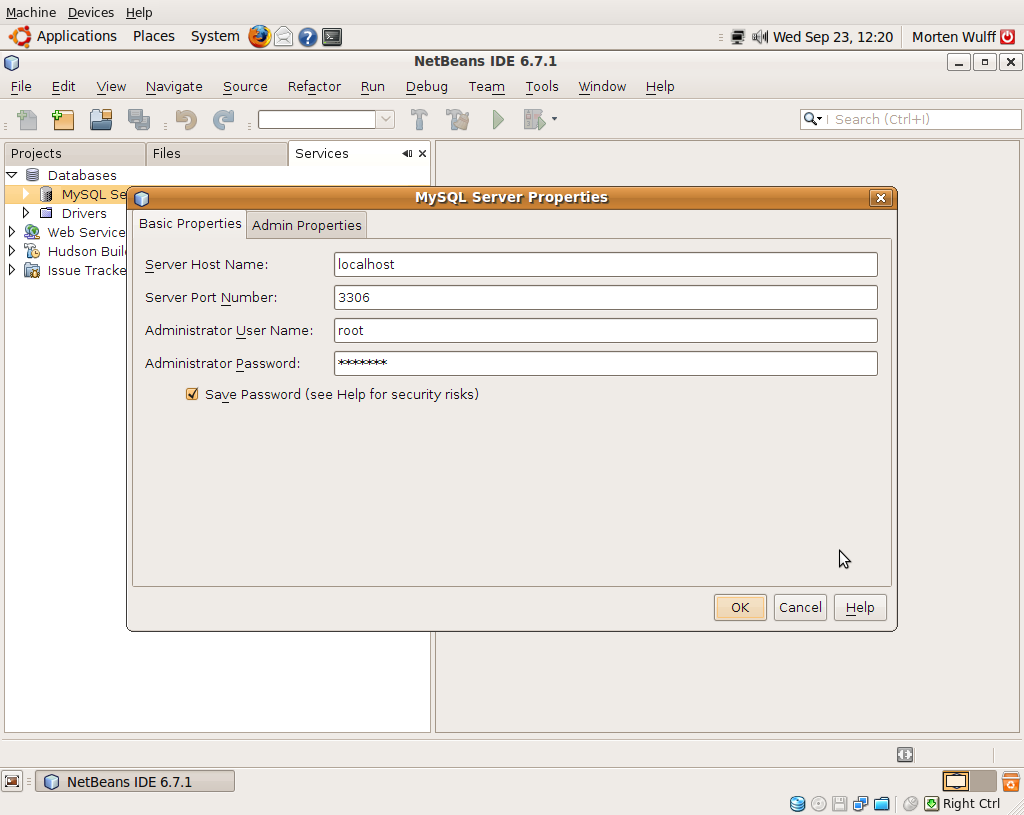
Go to the Services tab, expand the Databases item and right-click on the MySQL Server at localhost entry and choose Properties…. If you can’t see the Services tab, press CTRL-5 or go to Windows → Services to enable it.
Enter the MySQL password you chose when setting up the LAMP stack in the Administrator Password field and check the Save Password box. You are now connected to your local database server. If, for some reason, the connection is dropped, you can right-click on the MySQL Server at localhost entry and choose Connect to reconnect to the server.
Install Drupal
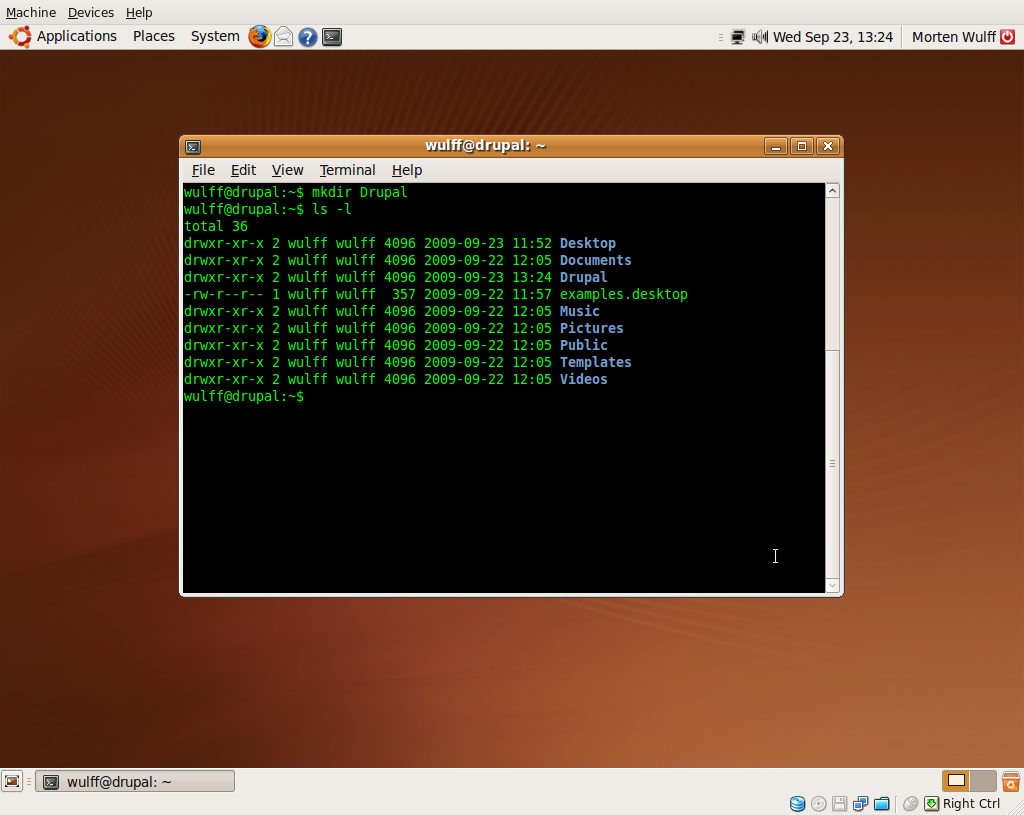
Before you can begin installing local Drupal sites you must create a local folder for them. Open a terminal window and run the following command to create a sub-directory in your home directory:
mkdir DrupalWe will use this as the base directory for all local Drupal sites.
From an official release
Installing a local copy of an official Drupal release requires the following actions:
- Download and unpack a stable release of Drupal
- Create an entry in the hosts file
- Create an Apache virtual host
- Create a NetBeans project
- Create a MySQL database
- Run the Drupal installer
In the following sections each of these steps will be described in detail.
Download and unpack Drupal
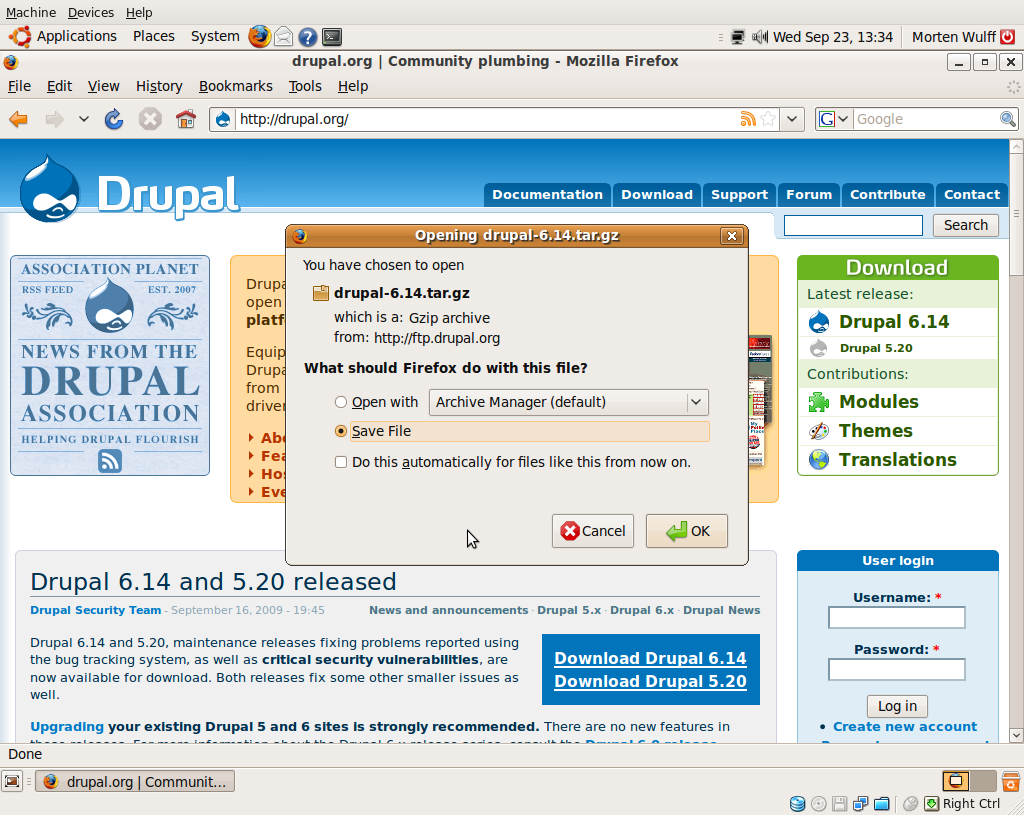
Go to Drupal.org and download the latest version of Drupal. At the time of writing this is version 6.14. Save the file in the Drupal sub-directory in your home folder.
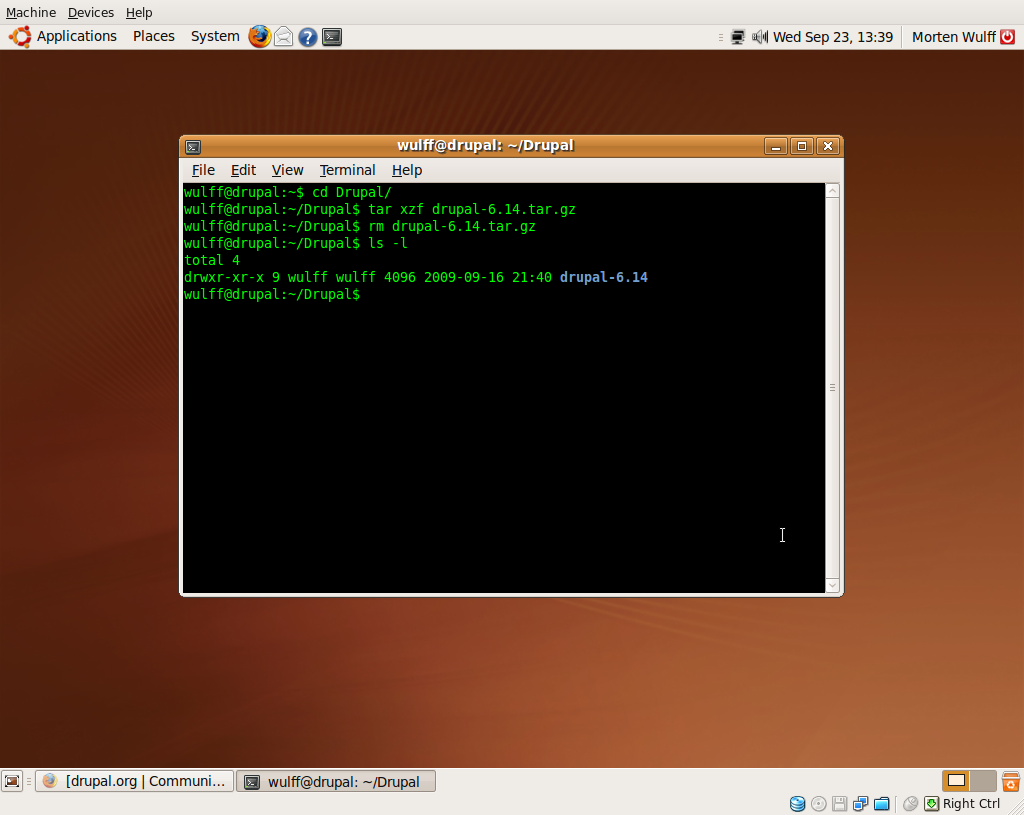
Next, open a terminal window and type the following commands to change to the Drupal sub-directory and unpack the downloaded file:
cd Drupal/
tar xzf drupal-6.14.tar.gz
rm drupal-6.14.tar.gz
You now have a copy of the latest version of Drupal in your Drupal folder.
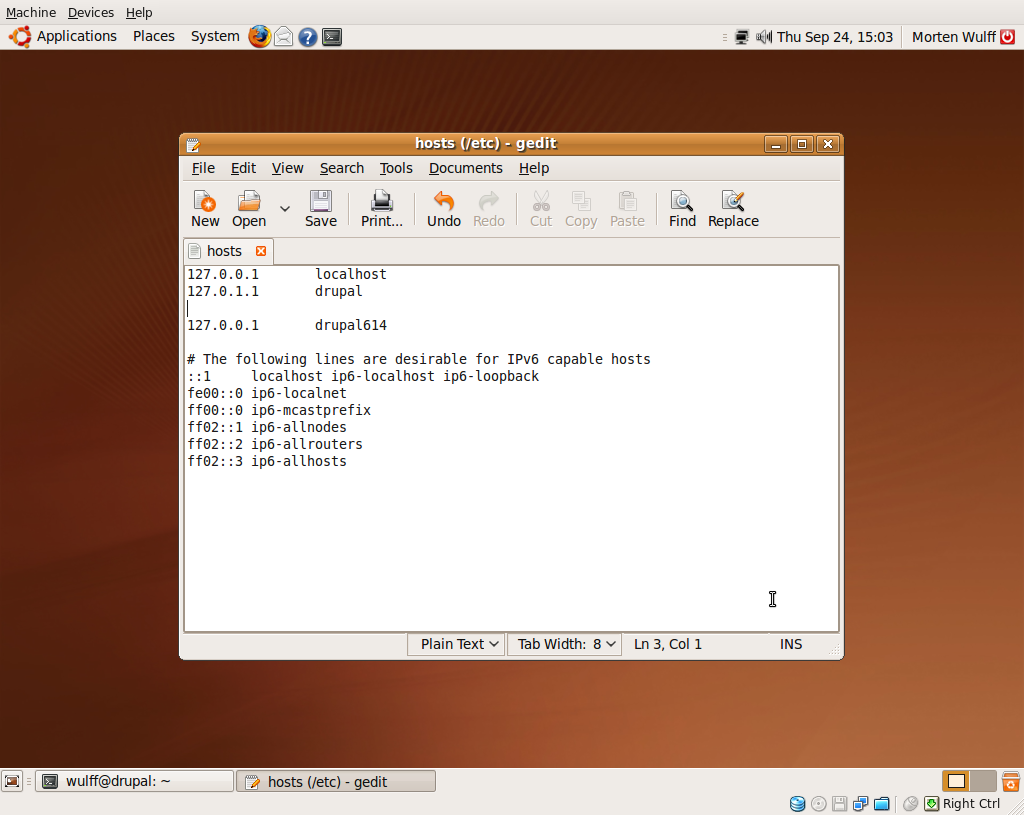
Create an entry in the hosts file
To make it possible to run a number of local Drupal sites simultaneously, each site must have its own hostname. To add a new hostname, open a terminal window and run the following command to open the hosts file in a text editor:
sudo gedit /etc/hostsSince we’re setting up Drupal 6.14, we’ll add the hostname drupal614 to the hosts file and have it point at the local web server on the IP address 127.0.0.1.
Save the file and exit the text editor when you have added the hostname.
Create a Apache virtual host
Next we have to create a new Apache virtual host to handle requests to http://drupal614/. Open a terminal window and run the following commands to create a new virtual host definition:
cd /etc/apache2/sites-available
sudo gedit drupal614
It is a good idea to use the hostname as the name of the virtual host file. This makes it easier to manage a lot of virtual hosts.
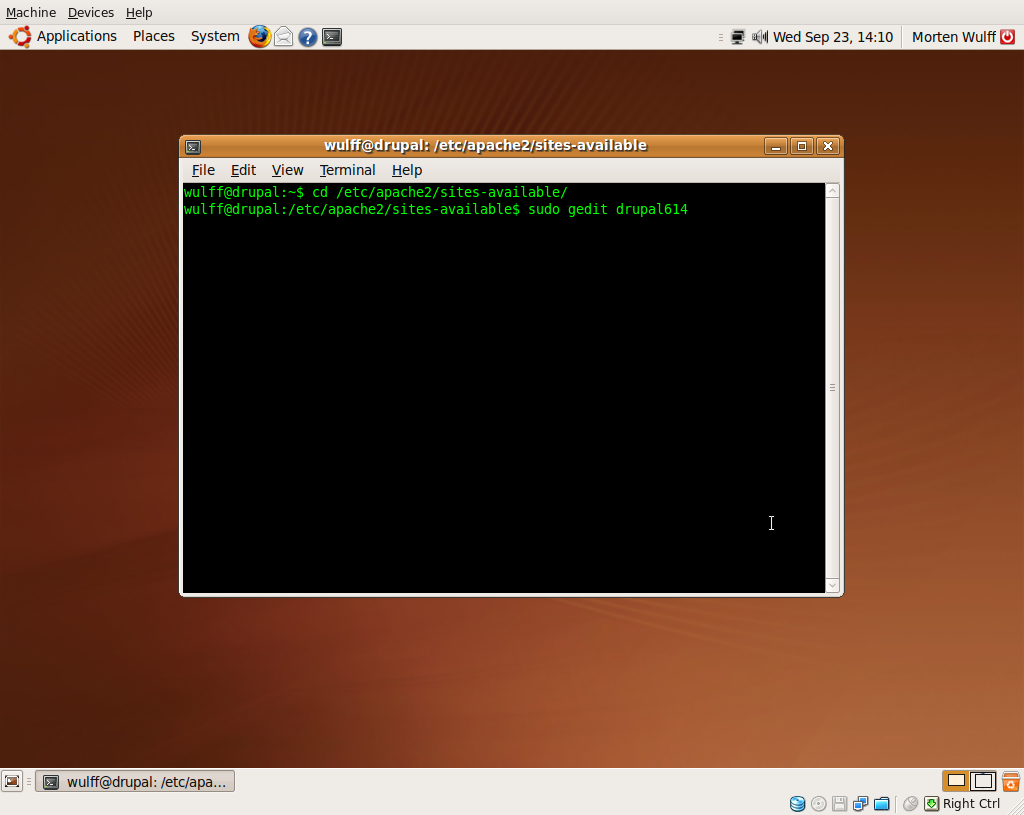
Enter the following virtual host definition and save the file:
<VirtualHost *:80>
  ServerAdmin webmaster@localhost
  ServerName drupal614

  DocumentRoot /home/<username>/Drupal/drupal-6.14

  <Directory />
    Options FollowSymLinks
    AllowOverride All
  </Directory>
</VirtualHost>
The ServerName must match the hostname you added to the hosts file, and the DocumentRoot must match the name of the folder where Drupal is installed. Replace <username> with the username you use to log in to the local machine (on this machine it got replaced by wulff).

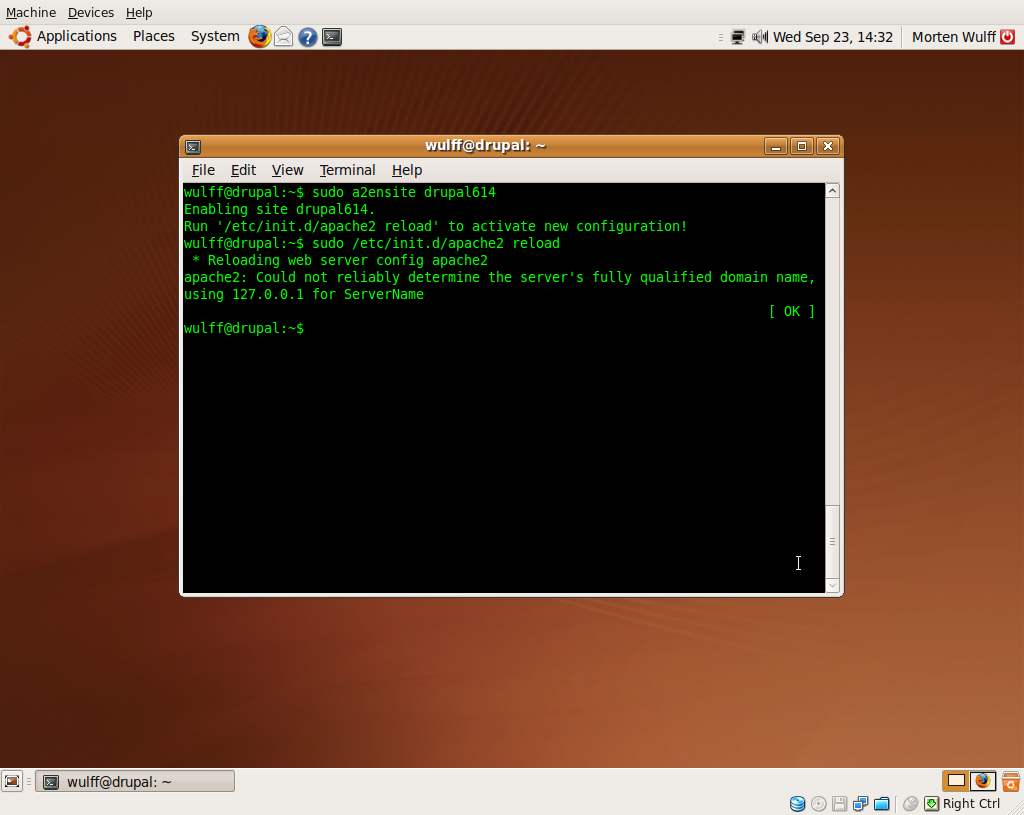
When you have saved the file, you can run the following commands in a terminal window to enable the new virtual host and reload the Apache configuration:
sudo a2ensite drupal614
sudo /etc/init.d/apache2 reload
You can now access the Drupal site at http://drupal614/.
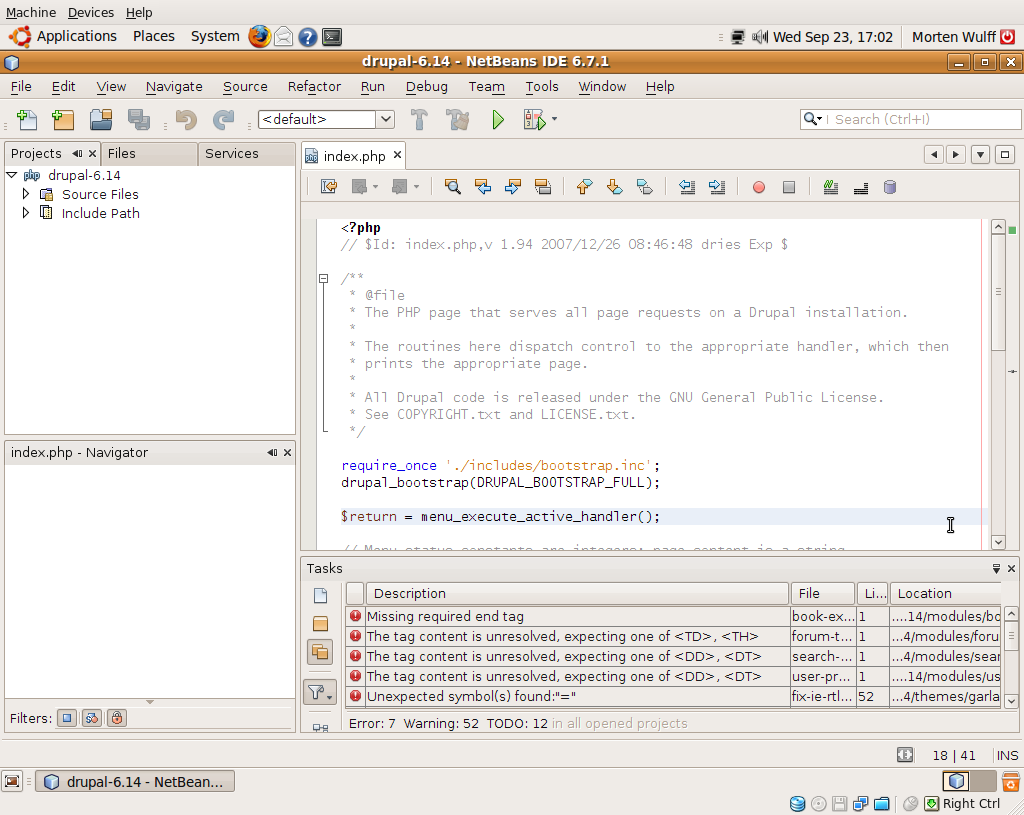
Create a NetBeans project
The next step is to create a new NetBeans project to handle the source code of the new Drupal site.
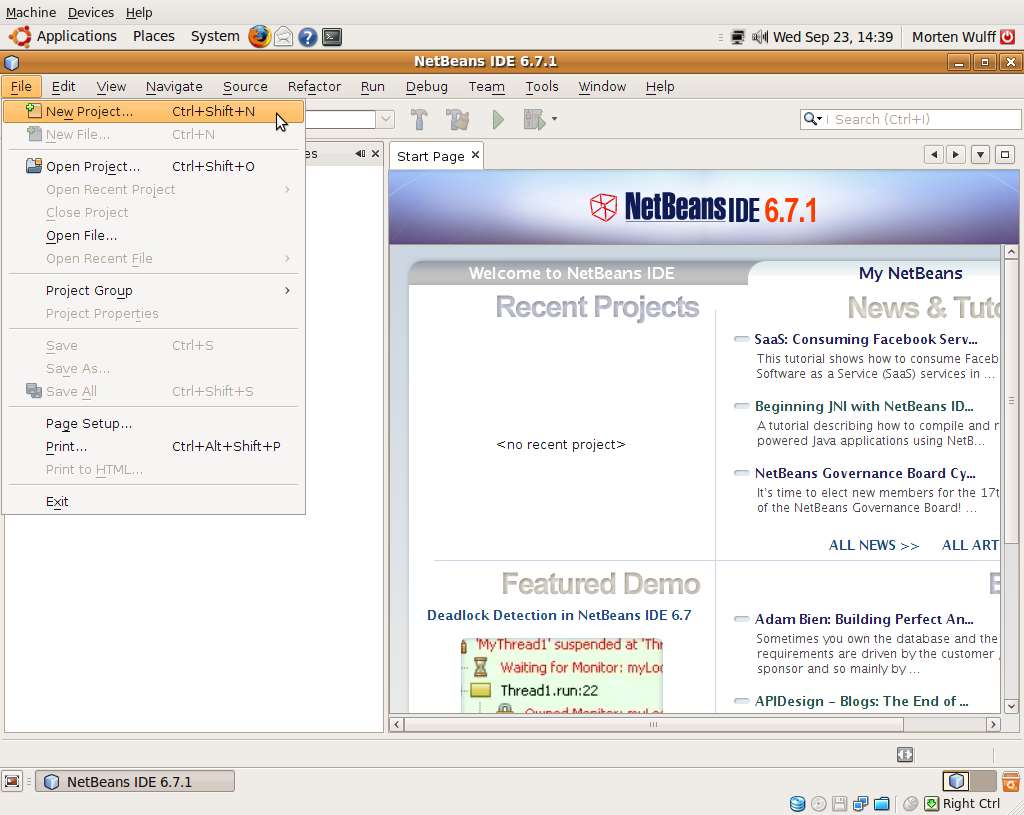
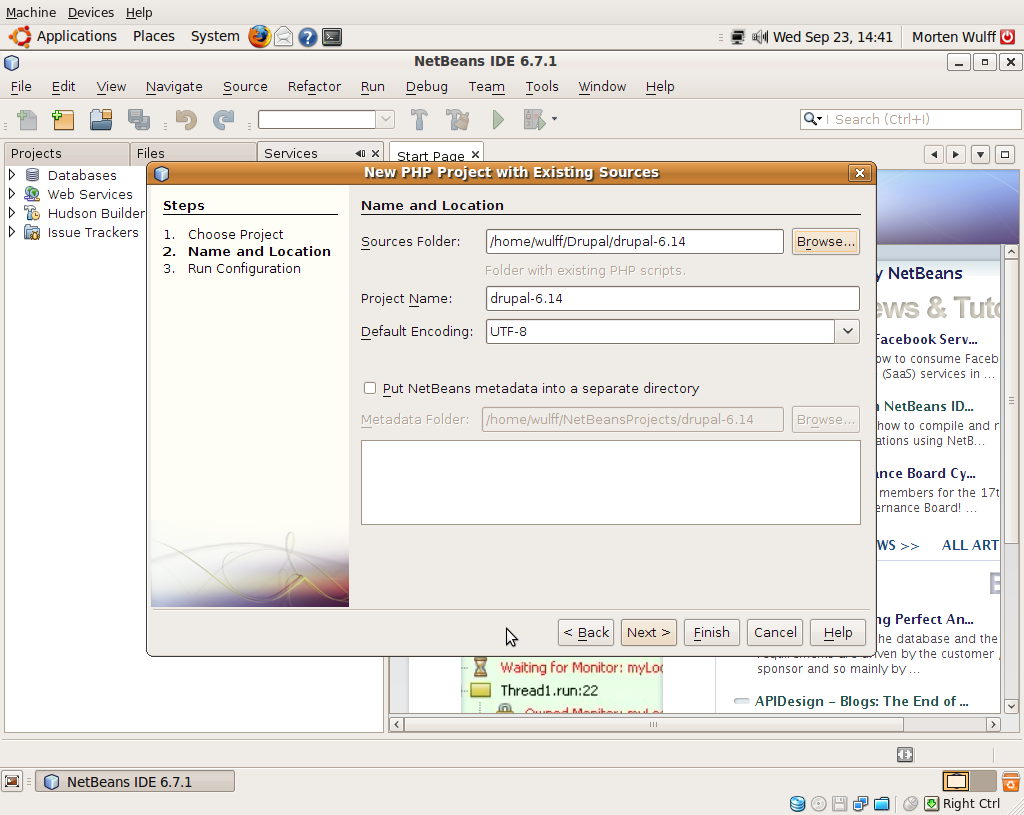
Open NetBeans and choose File → New Project… and choose to create a new PHP application from existing sources.

Select the correct sub-directory in your Drupal folder and name the project. Leave the encoding as UTF-8 and let NetBeans put its metadata in the sources folder.
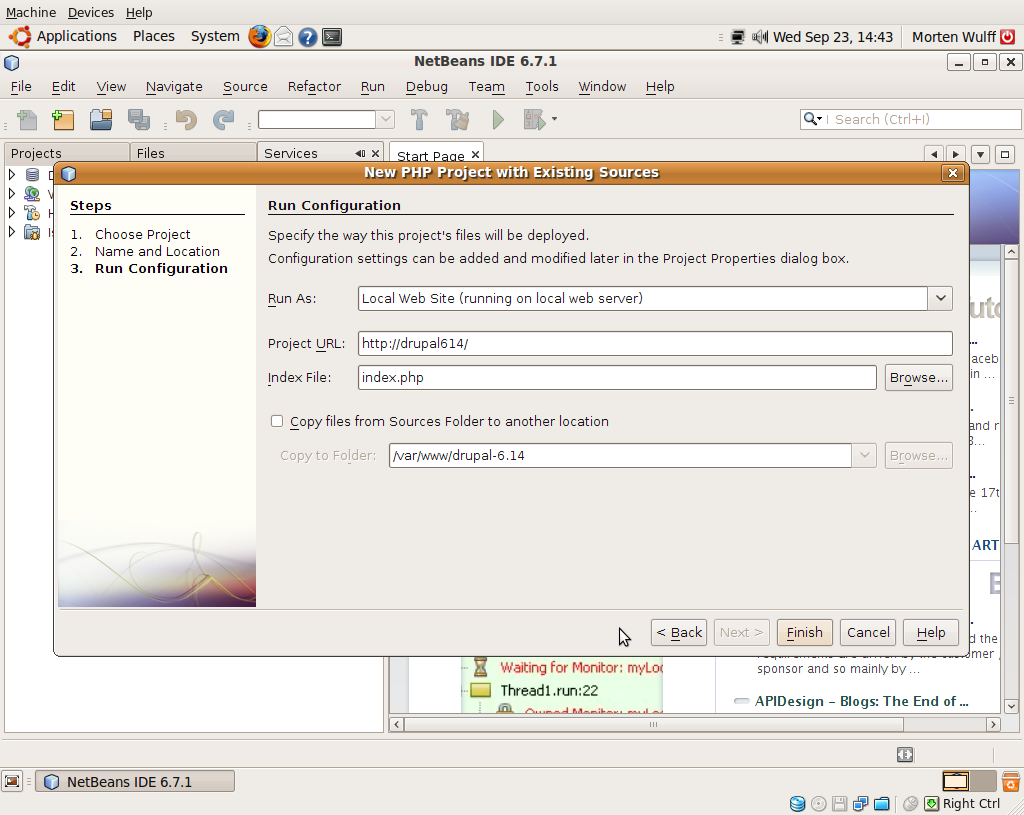
In the final step, set the project URL to http://drupal614/ and leave the index file as index.php.
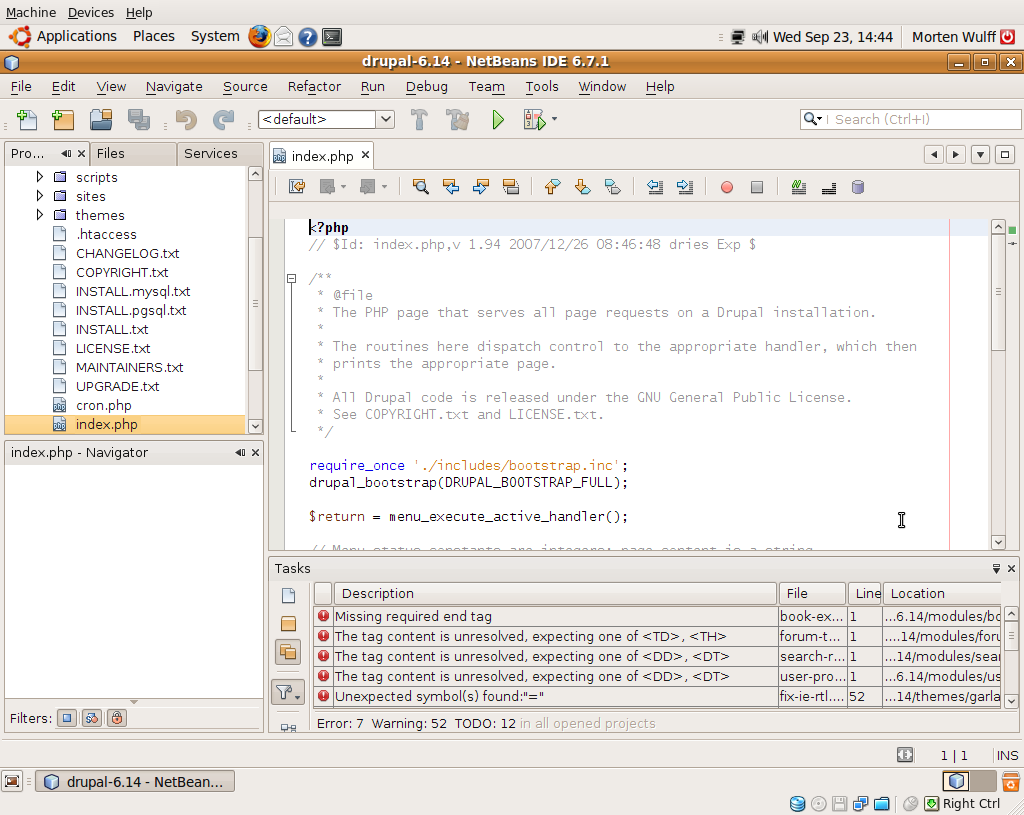
NetBeans will now scan the source files to enable autocomplete and open the index.php file in the editor pane. You can close the Palette window on the right to get more screen space for the editor window.
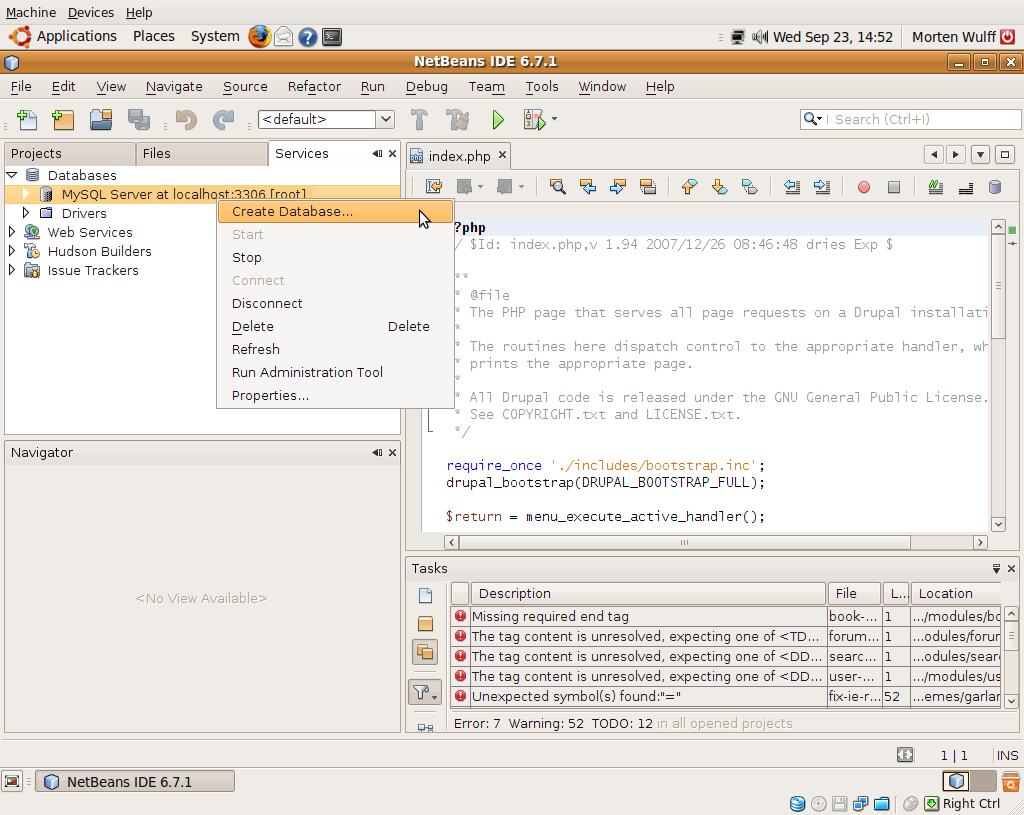
Create a MySQL database
The final step before you can run the Drupal installer is to create a new database for the new Drupal site.
Go to the services tab in NetBeans and connect to the local database server if you are not already connected.
Right-click on the local MySQL server and choose Create database. Choose a name for the database (in this case, we’ll name it drupal_614) and grant full access to the drupal user you created in a previous step.

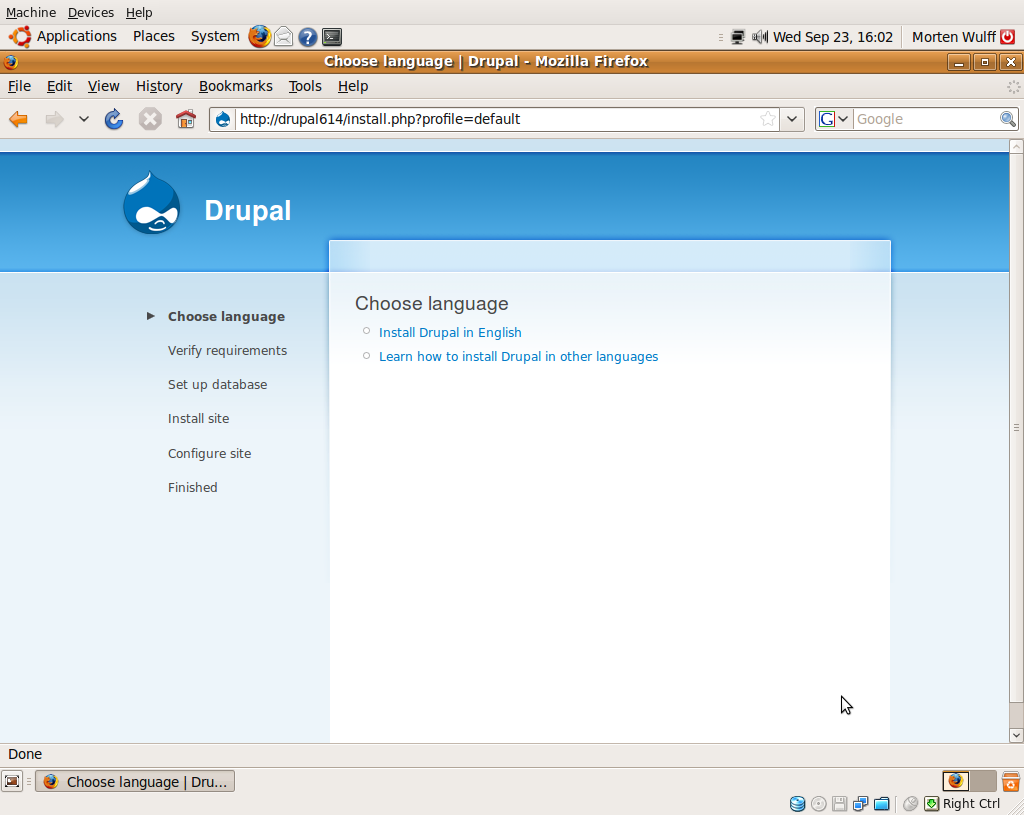
Run the Drupal installer
Now we are ready to install Drupal. First off, we need to create a writable settings file. Open a terminal window and run the following commands:
cd Drupal/drupal-6.14/sites/default/
cp default.settings.php settings.php
chmod a+w settings.php
mkdir files
chmod a+wx files
Open Firefox and go to the URL http://drupal614/. When you get to the Set up database step, enter the name of the database you created previously, and the username and password for the drupal user.
When you get to the Configure site step Drupal has made all necessary changes to the settings.php file. You can now write-protect the file by opening a terminal window and running the following commands:
cd Drupal/drupal-6.14/sites/default/
chmod a-w settings.php
Perform the final steps of the installer, and you are ready to play around on your new Drupal site.
From CVS
This section will describe how to set up a new Drupal site from a CVS checkout.
NetBeans overview
If you haven’t changed any settings, NetBeans will show the following windows on startup:
- The main editor
- Projects
- Files
- Services
- Navigator
- Tasks
You can find add more windows by going to the Window menu. We will cover a couple of these windows in the Xdebug section.
The Projects window shows a list of all your NetBeans projects. You can use it to browse the source of all your projects in one place and to see the include paths for different projects (by default all new projects use the global PHP include path).
The Files window shows all source files in the active project.
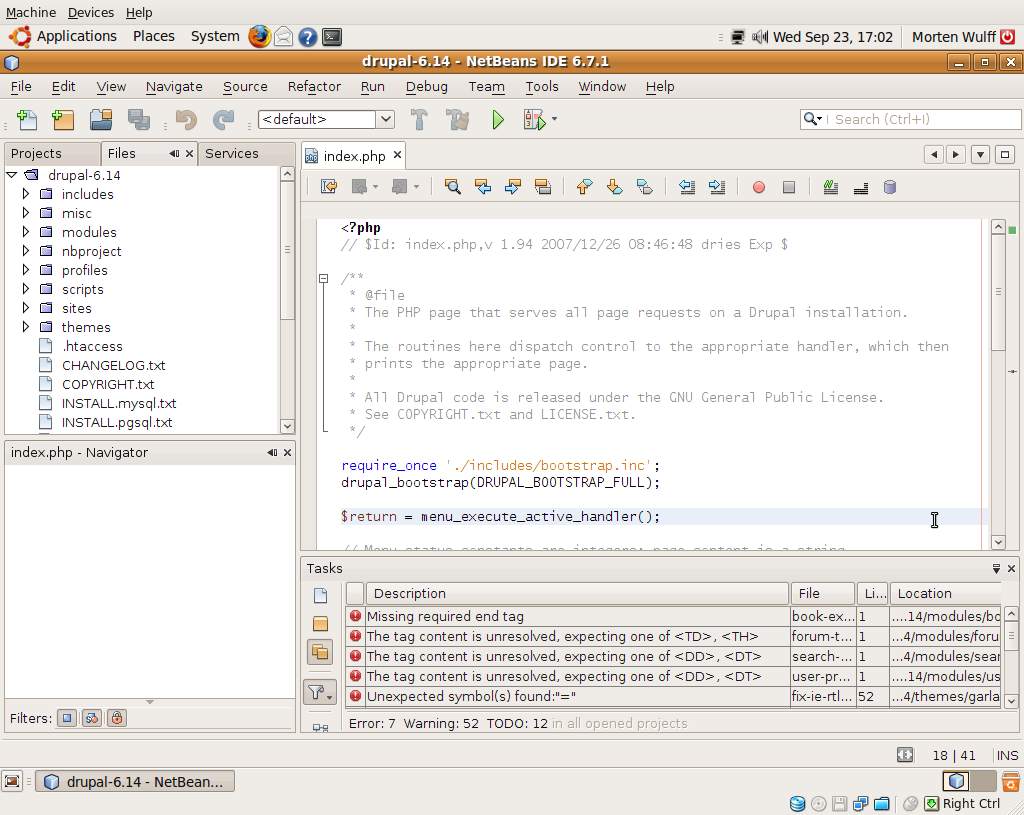
The Services window gives you easy access to local database servers, web services, and issue trackers.
The Navigator window shows a list of all the functions in the active file. You can double-click any function name to jump directly to the first line of a function in the editor window.
The Tasks window gives you an overview of all syntax errors, warnings, and todo items. By default, all occurences of the strings TODO, FIXME, XXX, and PENDING are added to the task list. Go to Tools → Options → Miscellaneous → Tasks to add your own string patterns.
Code completion
NetBeans makes developing for Drupal easier because it offers code completion of all built-in PHP functions and all functions defined in your current project. This way you have the full Drupal API and its documentation at your fingertips without having to consult api.drupal.org every time you want to check the exact behavior of a function.
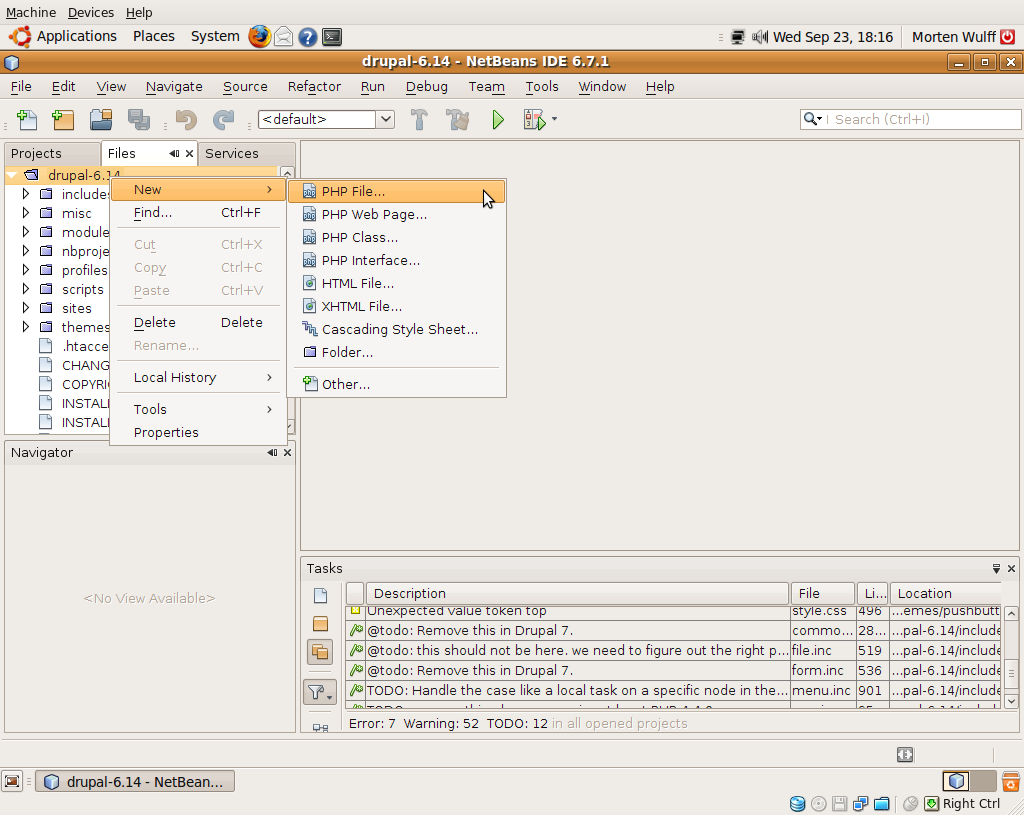
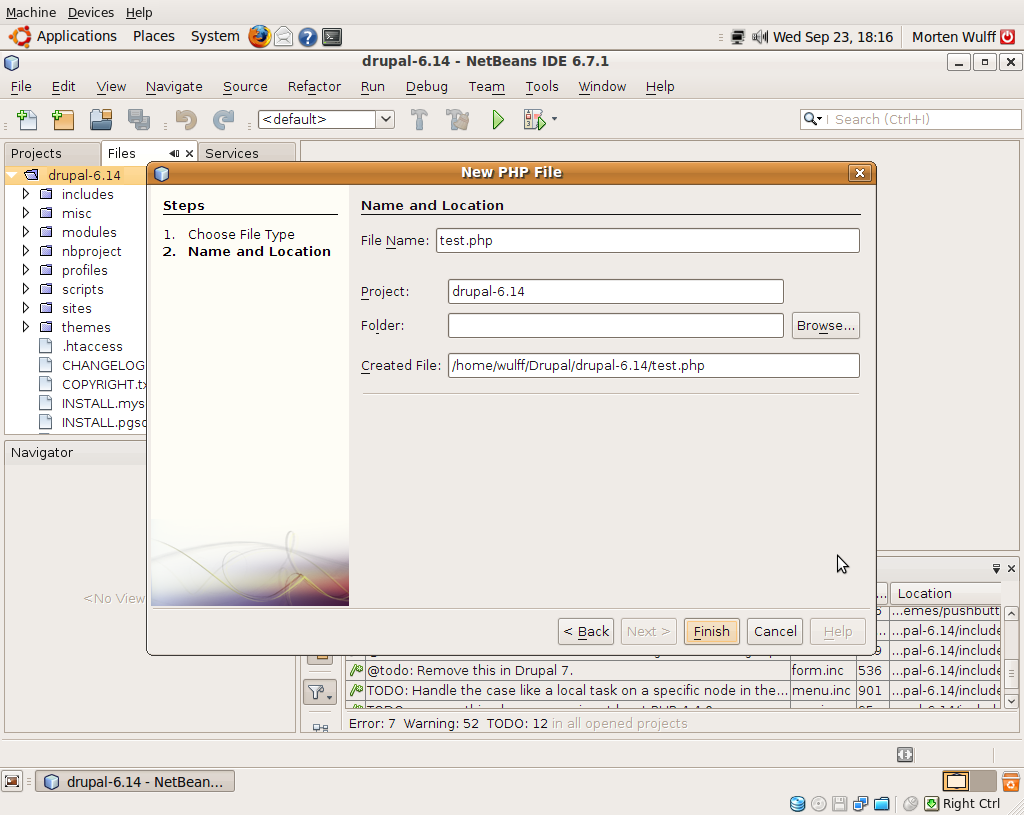
You can try it out for yourself by creating a new PHP file in the root of your Drupal folder. Right-click on the root folder (in this case, it’s called drupal-6.14) and choose New → PHP file.
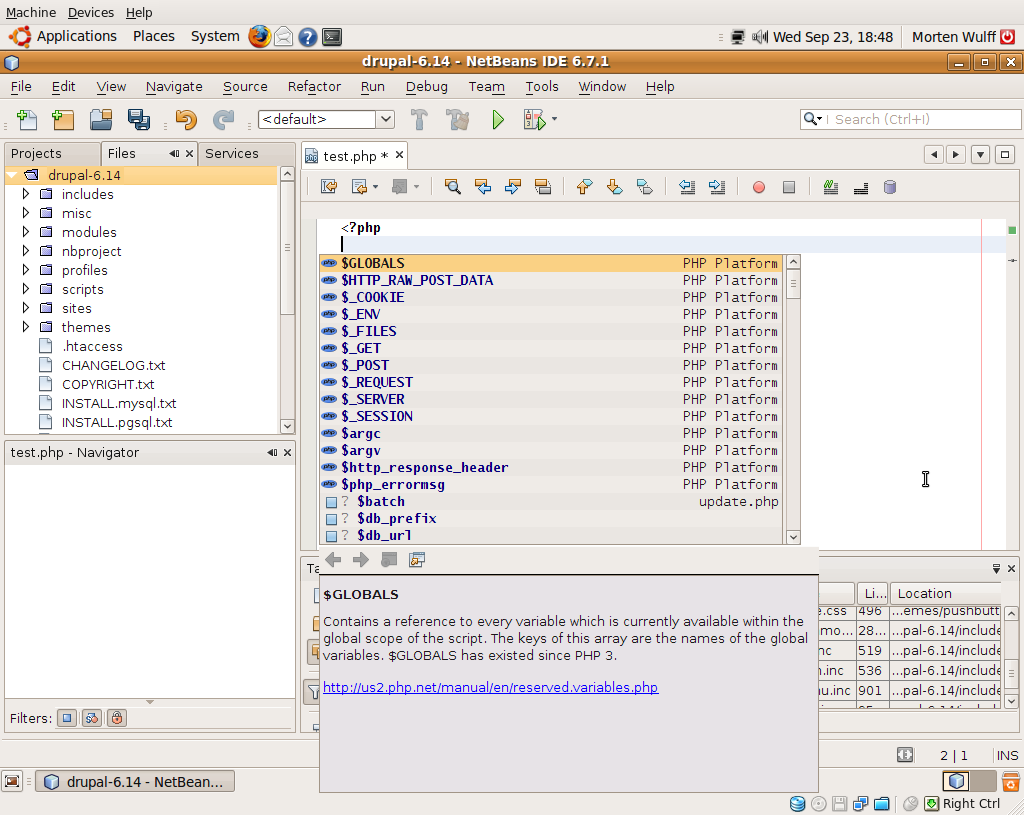
If you place the cursor on an empty line and press CTRL+SPACE, NetBeans opens a popup listing all global variables and constants. Start typing to narrow down the list or use the arrow keys to choose the variable you want to insert. Press enter to insert the variable name at the current cursor position.
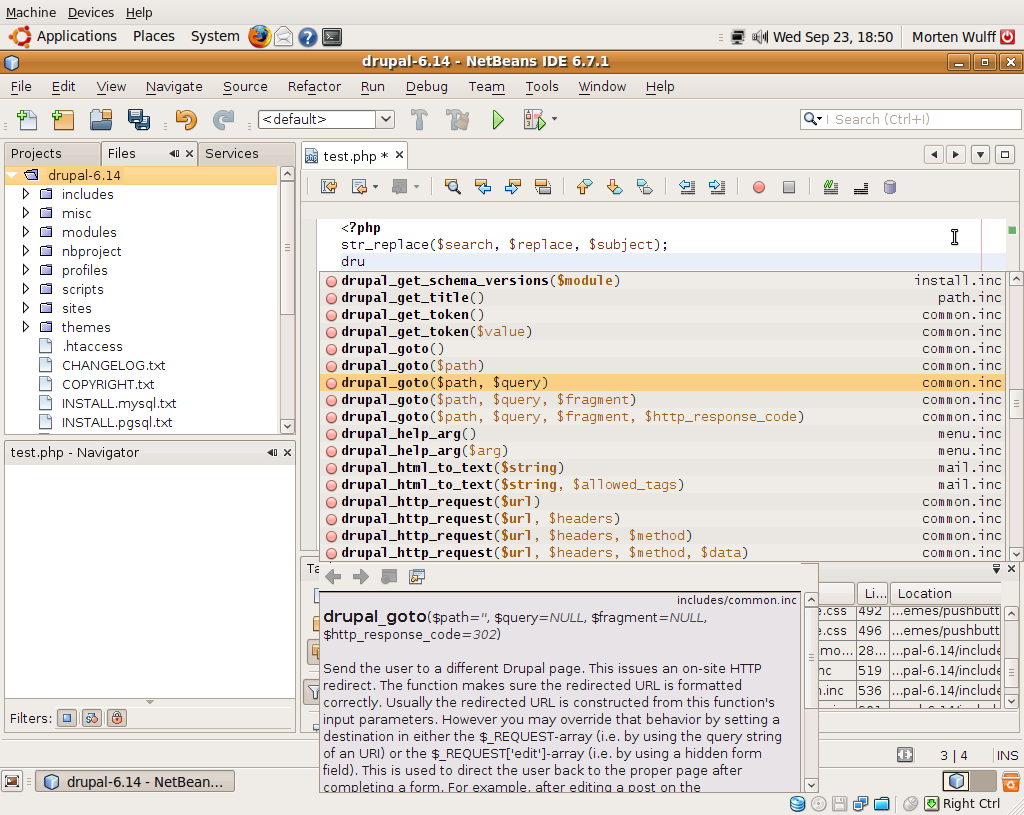
Start typing the first few characters of the PHP function str_replace and press CTRL+SPACE after you have typed str. NetBeans opens two popups: One showing a list of matching function names and a second showing the documentation for the currently selected function. Type more characters to narrow your search or use the arrow keys to choose the function you want to insert. Press enter to insert the function name at the current cursor position.

This works for Druapl API functions and functions from contributed modules as well. Try typing dru and then press CTRL+SPACE to show a list of all matching functions.
Variable highlighting
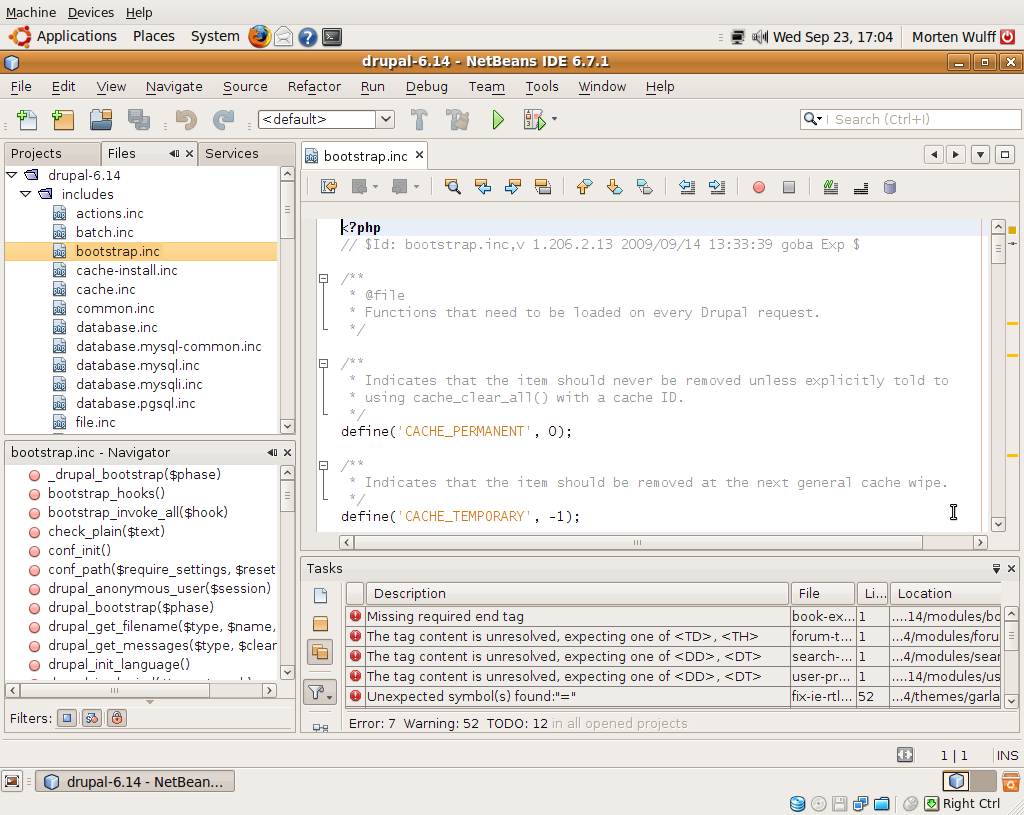
Another useful feature is variable highlighting. Open the file bootstrap.inc in the includes folder and jump to the function drupal_bootstrap() by double-clicking it in the Navigator window. If you place the cursor somewhere in the first occurence of the variable $phase_index, NetBeans automatically highlights all four occurences of that variable in the function. This is useful when you are trying to determine whether a local variable is still in use, or to figure out which role a variable plays in a function.

Navigating code
Sometimes it’s nice to see where a certain function is defined. This is easy to do in NetBeans by using Go to Declaration.
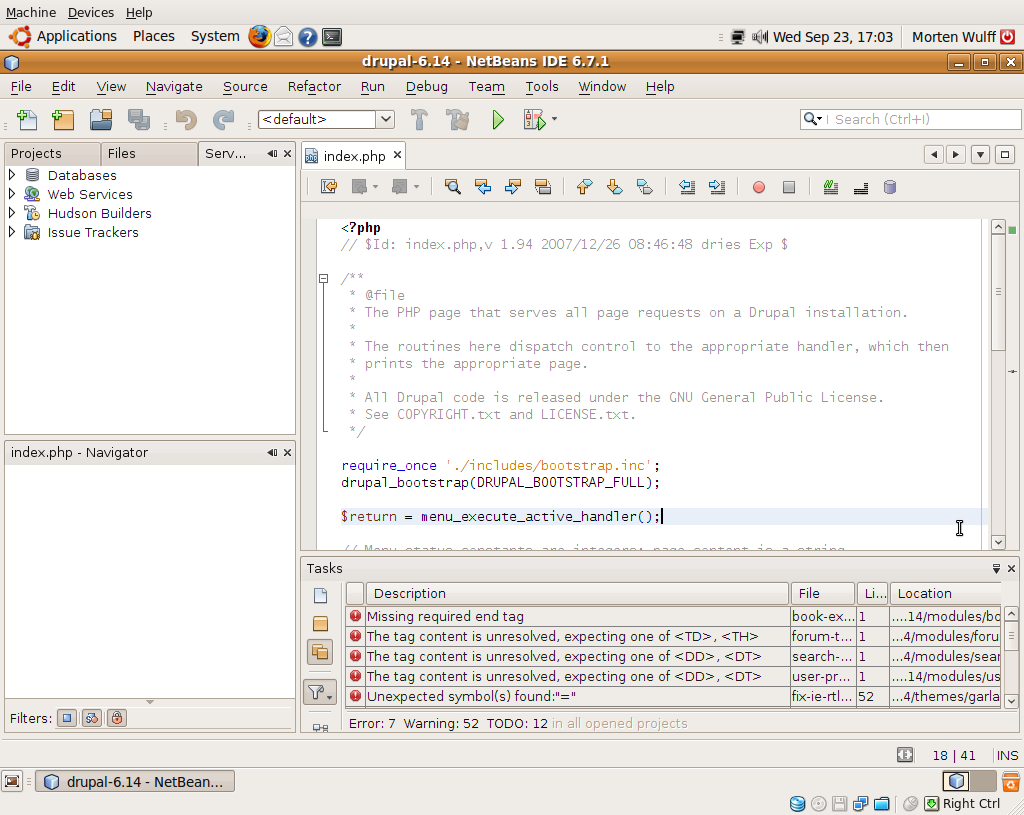
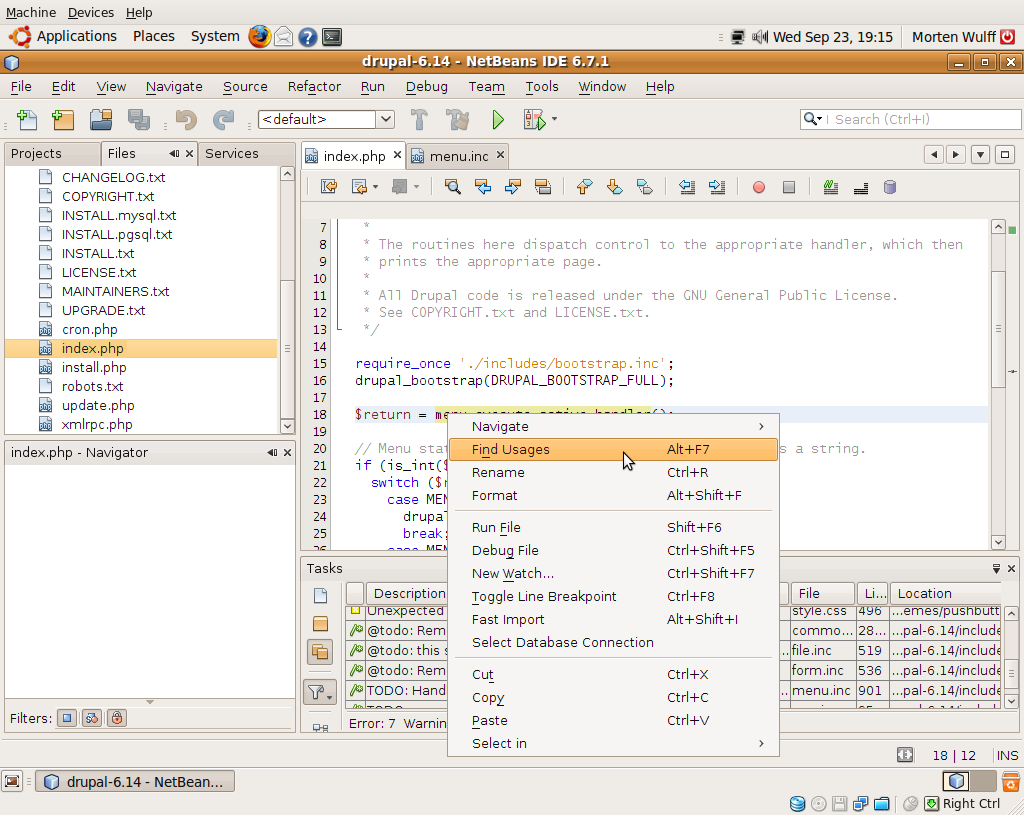
Open index.php in the root of the Drupal folder and place the cursor somewhere in the function name menu_execute_active_handler() on line 18. (Choose View → Show Line Numbers to enable line numbers in the editor.) Right-click the function name and select Navigate → Go to Declaration or press CTRL+B. NetBeans now opens the file menu.inc where the function is defined.

This example also shows a variation of the variable highlighting mentioned above. If you place the cursor at the beginning of a function name, NetBeans automatically highlights all return statements in the function.
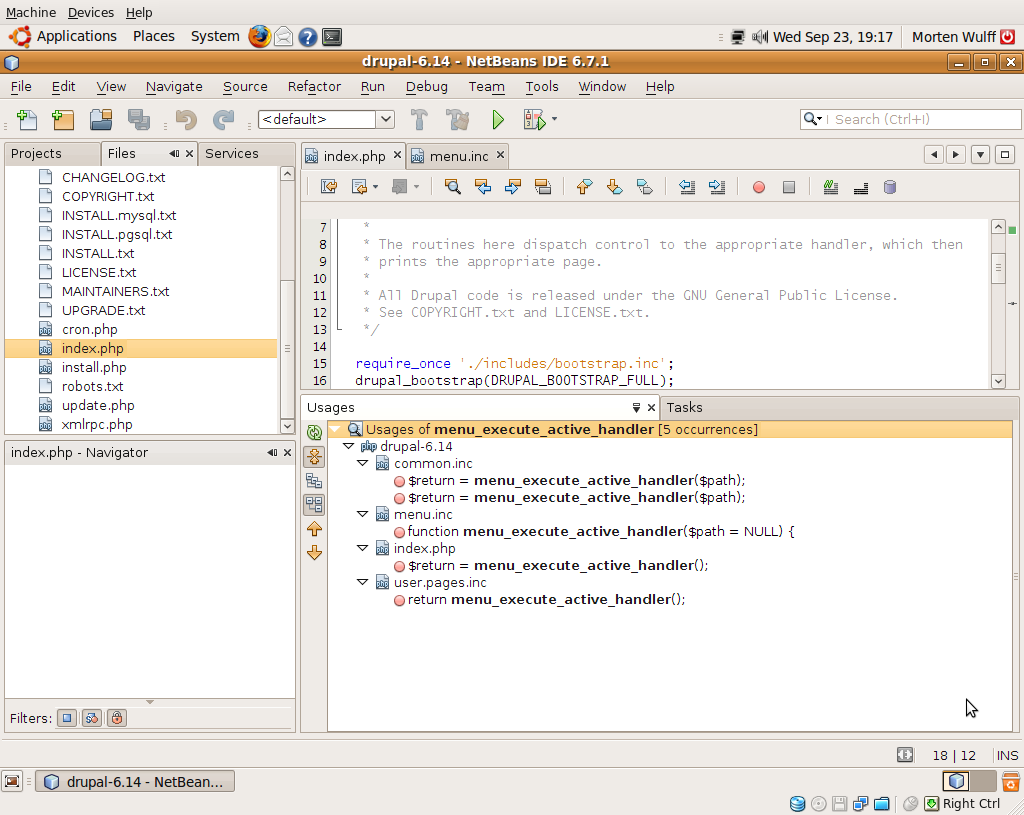
Another useful way of navigating your code is to figure out which functions are calling a given function. Return to index.php in the editor and place the cursor somewhere in the function name menu_execute_active_handler(). Right-click the function name and select Find Usages or press ALT+F7. When you click Find in the dialog, NetBeans opens the Usages window and shows a list of all the calls to the selected function.

TODO: Add information on code folding.
Debug your code
Xdebug lets you step through your code line by line, inspecting variables and the call stack as you go. This makes identifying problems faster than having to rely on printed debug statements or log files.
Configure Xdebug
Before we can start debugging with Xdebug, we need to modify the Xdebug configuration. Open a terminal window and run the following command to open the xdebug.ini file in a text editor:
sudo gedit /etc/php5/conf.d/xdebug.iniAdd the following lines to the file:
xdebug.remote_enable=on
xdebug.remote_handler=dbgp
xdebug.remote_mode=req
xdebug.remote_host=127.0.0.1
xdebug.remote_port=9000
When you have saved the file you must run the following command to restart Apache:
sudo /etc/init.d/apache2 restart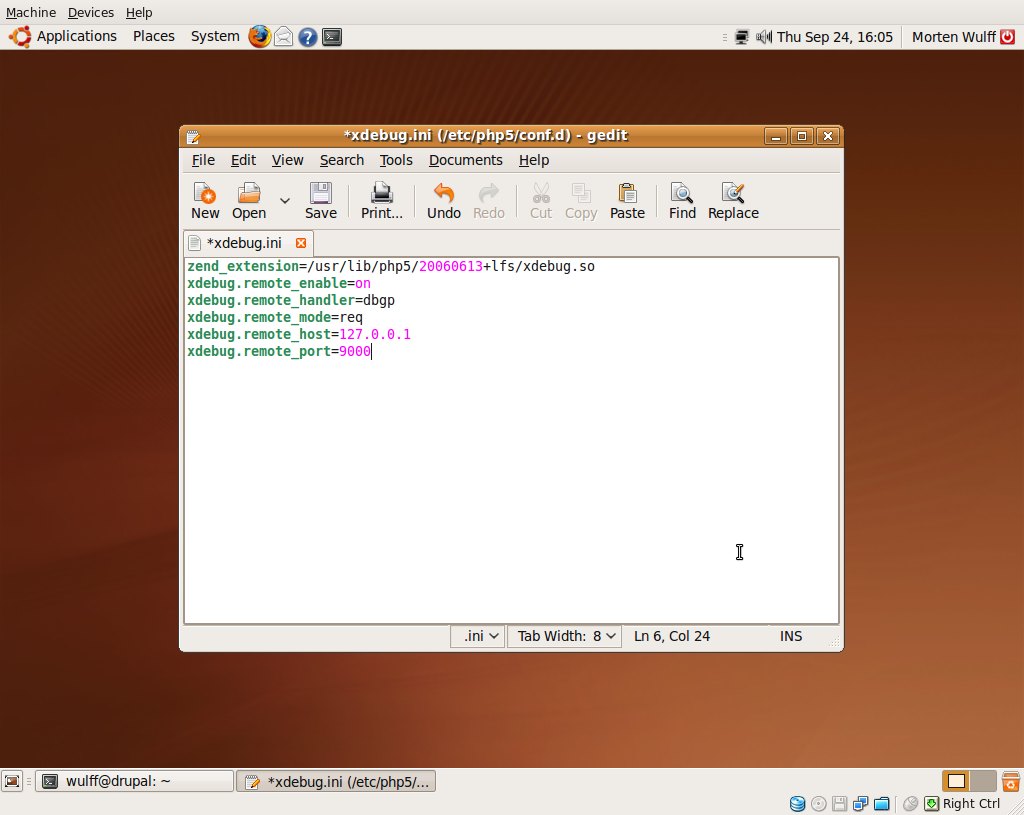
Debug with Xdebug
Now that the Xdebug PHP module has been configured, we can use NetBeans to step through the code as it is being executed by the Apache PHP module.
First, we need to mark the line of code where we would like execution to stop. This is called a breakpoint.
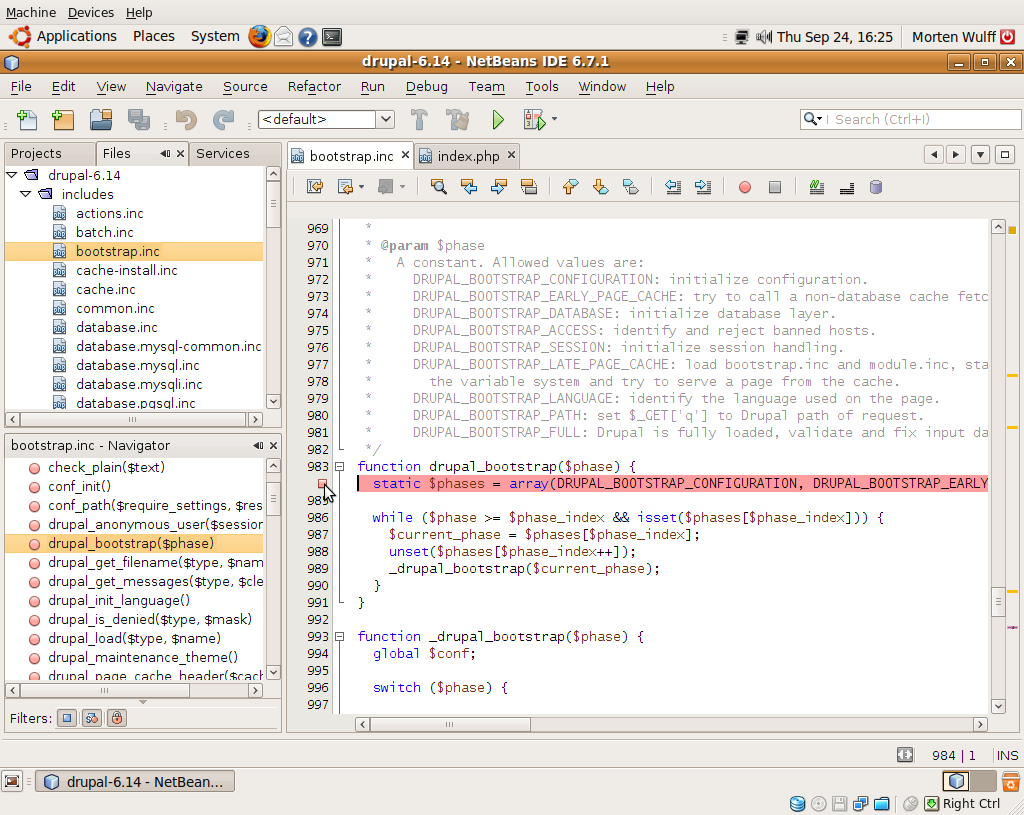
We’ll try to step through the Drupal bootstrap process, so start by opening the file includes/bootstrap.inc. Double-click the function drupal_bootstrap() in the Navigator to jump to line 983 in the file. Place the cursor in the first line of the function and click the line number (line 984) or press CTRL+F8 to set a breakpoint (Choose View → Show Line Numbers to enable line numbers in the editor window).
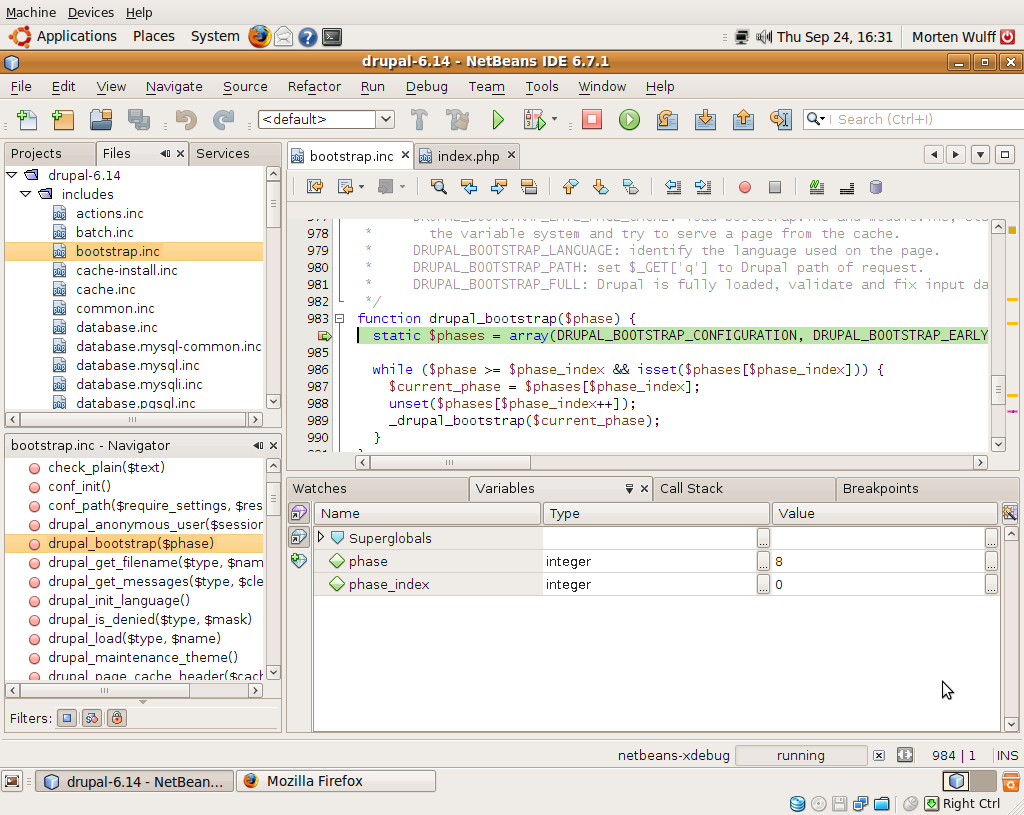
Choose Debug → Debug Project or press CTRL+F5 to start a debugging session. The first time you do this, NetBeans displays a dialog where you can configure some general debugging options. Choose Server side PHP and tell NetBeans not to show the dialog again.


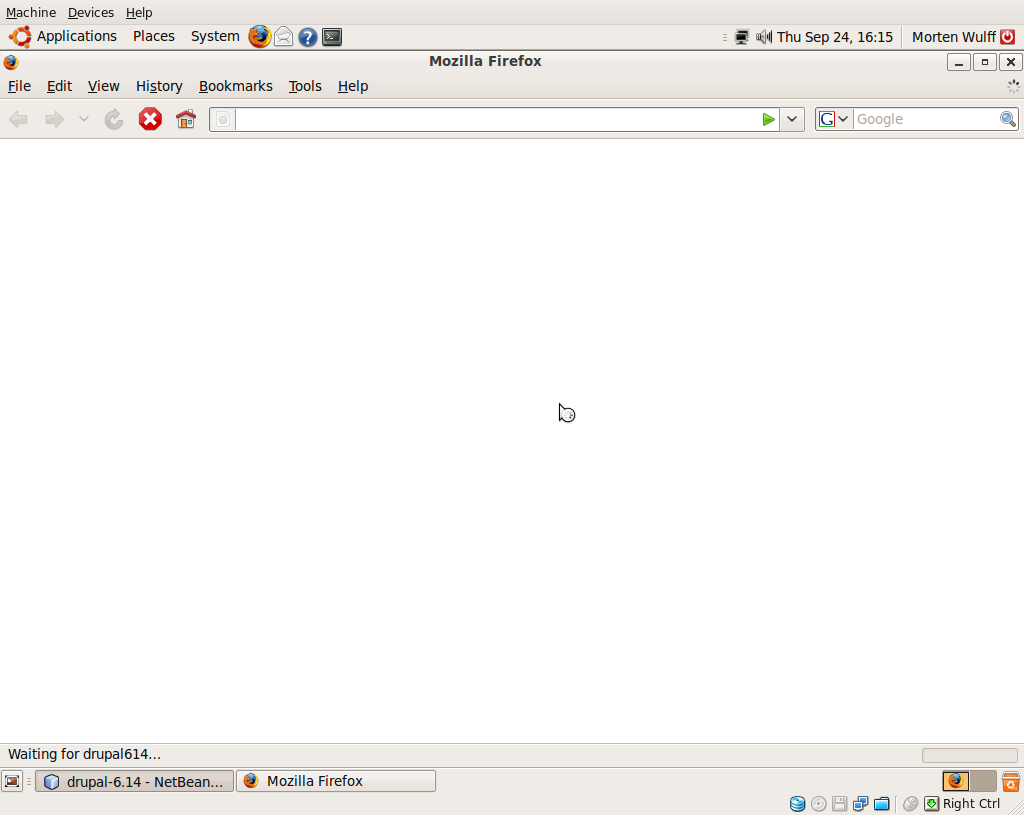
NetBeans will open the front page of your site in FireFox and stop at the first breakpoint it encounters. If you return to the NetBeans window you will see a small green arrow next to the line which is about to be executed.
Also, NetBeans automatically opens four windows below the editor windows: Watches, Variables, Call Stack, and Breakpoints. In the Variables window you can see a list of all the variables which are currently in scope as well as all the PHP superglobals. The Call Stack window displays the current call stack, and the Breakpoints windows displays a list of all breakpoints.


Keyboard shortcuts
Use the following shortcuts to step through the code when running under the debugger:
| Key | Action | Description |
|---|---|---|
| F5 | Continue | Runs until the next breakpoint or until the code exits, whichever comes first |
| F8 | Step over | Steps through the code one line at a time, but doesn’t enter any functions it encounters |
| F7 | Step into | Like step over, but steps into any functions it encounters |
| CTRL+F7 | Step out | Steps out of a function which has previously been stepped into |
| F4 | Run to cursor | Runs until the current line of execution is on the same line as a cursor (this is useful to skip past big blocks of uninteresting code) |
Profile your code
In addition to doing step through debugging, you can also use Xdebug to profile your code. Profiling your code lets you see which functions use most of the execution time, making it easy to spot candidates for optimization.
Configure Xdebug
Before you can use Xdebug to profile your code, you have to modify the configuration slightly. Open a terminal window and run the following command to open the xdebug.ini file in a text editor:
sudo gedit /etc/php5/conf.d/xdebug.iniAdd the following line to the end of the file:
xdebug.profiler_enable_trigger=1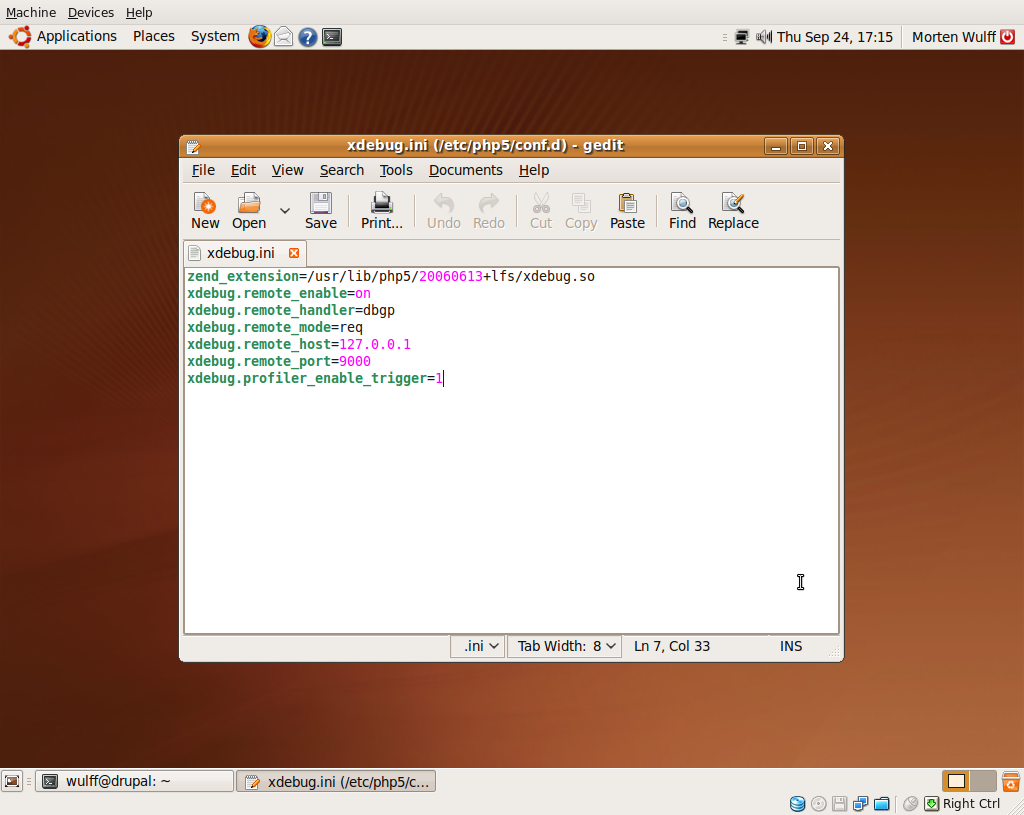
This lets you trigger the xdebug profiler from the browser.
When you have saved the file you must run the following command to restart Apache:
sudo /etc/init.d/apache2 restartInstall Webgrind
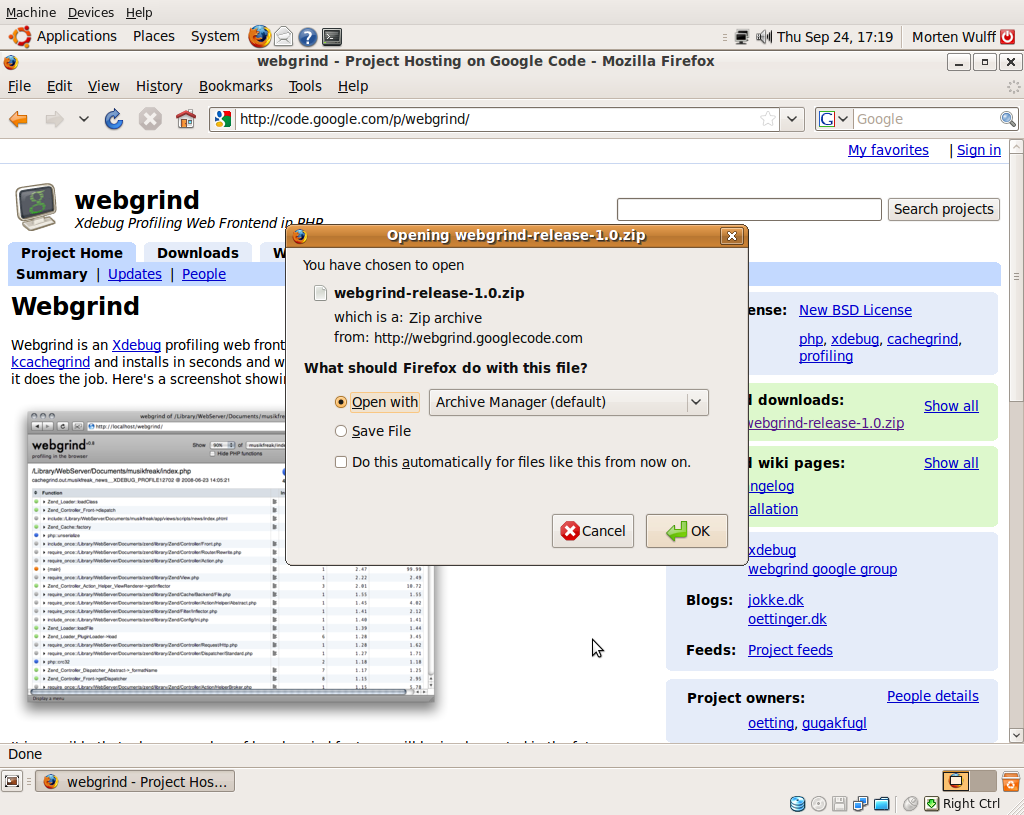
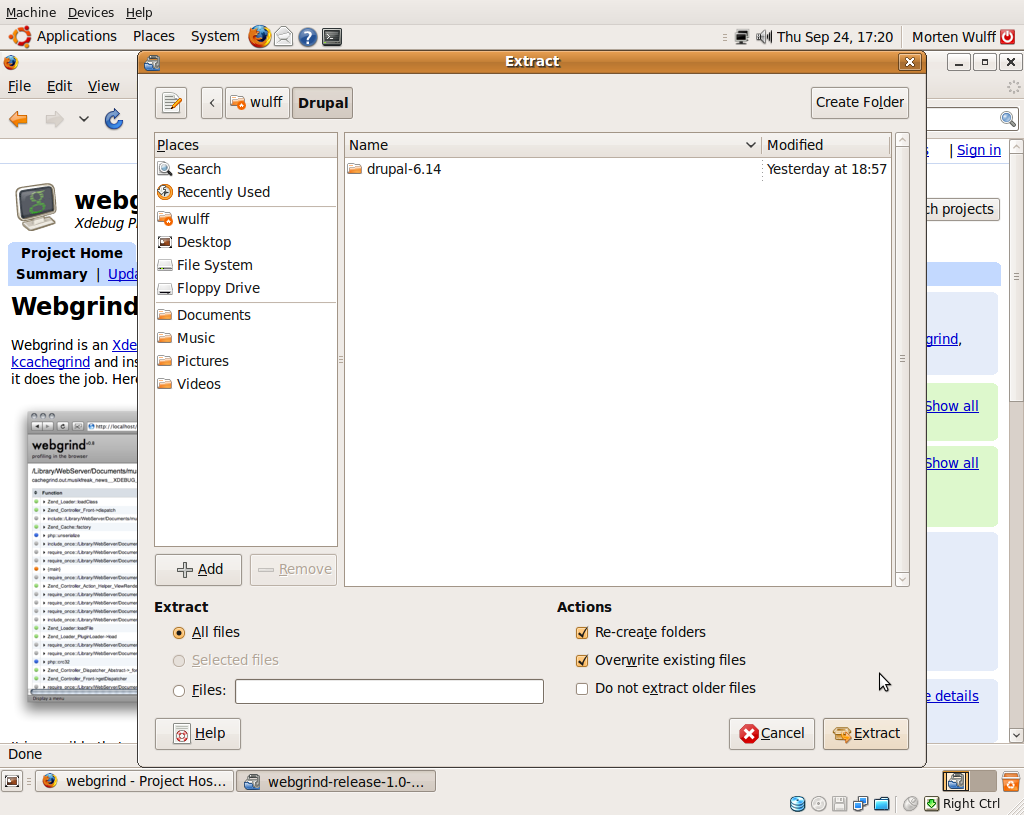
In order to analyze the output files generated by the profiler, you must install Webgrind.
Start by downloading the latest version of Webgrind. Open the file with the Archive Manager and extract the webgrind folder to the Drupal folder in your home directory.

Next, we’ll add a hostname for the local webgrind installation. Open a terminal window and run the following command to open the hosts file in a text editor:
sudo gedit /etc/hostsAdd an entry for webgrind and point it at the local web server on 127.0.0.1.

Finally, we have to create a new Apache virtual host to handle requests to http://webgrind/. Open a terminal window and run the following commands to create a new virtual host definition:
cd /etc/apache2/sites-available
sudo gedit drupal614
It is a good idea to use the hostname as the name of the virtual host file. This makes it easier to manage a lot of virtual hosts.
Enter the following virtual host definition and save the file:
<VirtualHost *:80>
  ServerAdmin webmaster@localhost
  ServerName drupal614

  DocumentRoot /home/<username>/Drupal/drupal-6.14

  <Directory />
    Options FollowSymLinks
    AllowOverride All
  </Directory>
</VirtualHost>
The ServerName must match the hostname you added to the hosts file, and the DocumentRoot must match the name of the folder where webgrind is installed. Replace with the username you use to log in to the local machine (on this machine it got replaced by wulff).

When you have saved the file, you can run the following commands in a terminal window to enable the new virtual host and reload the Apache configuration:
sudo a2ensite webgrind
sudo /etc/init.d/apache2 reload
You can now access Webgrind at http://webgrind/.
Start profiling
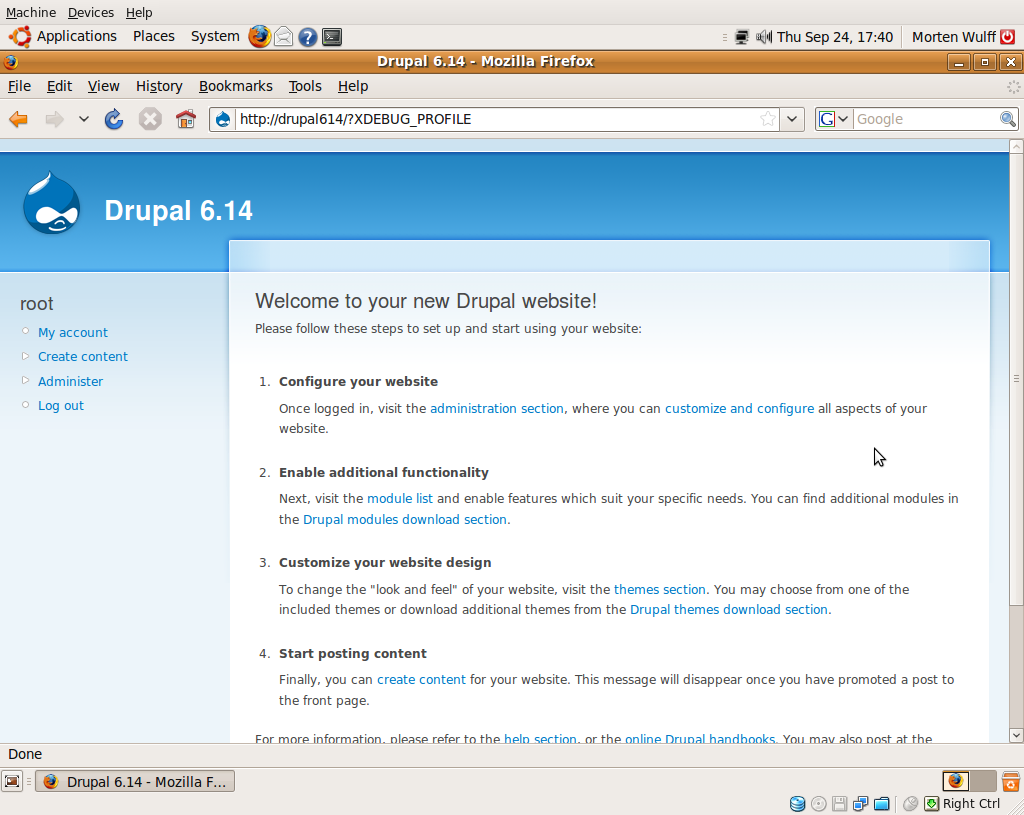
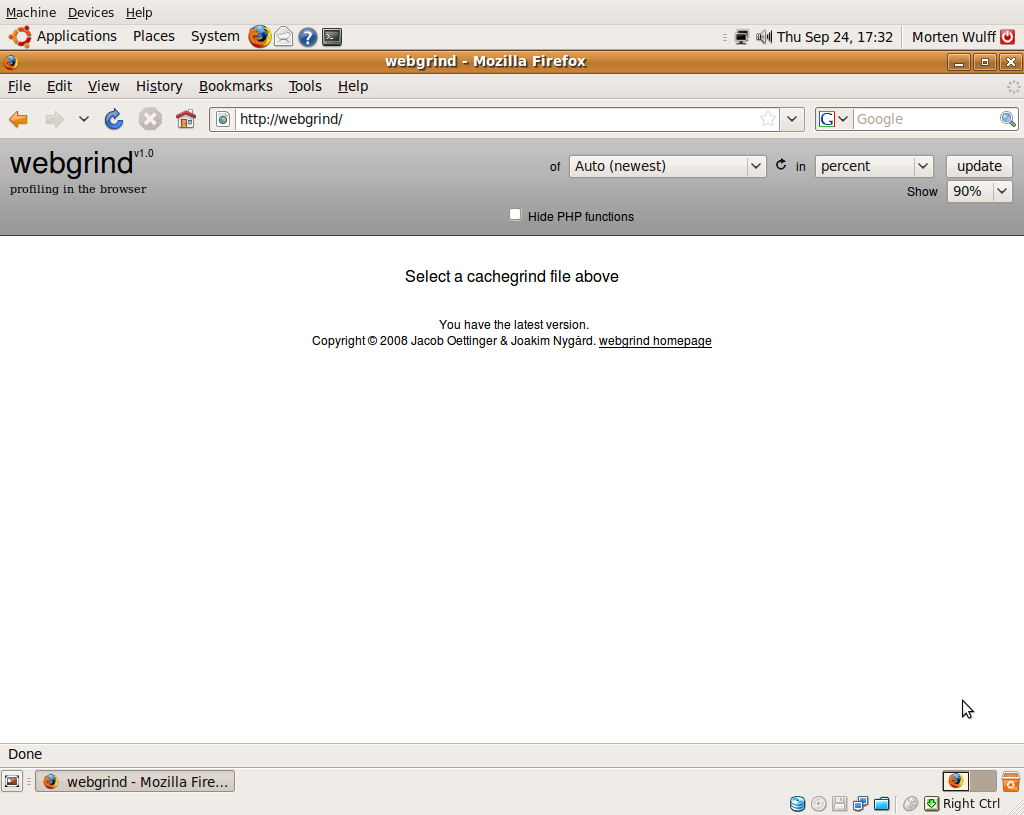
To start the profiler, simply add ?XDEBUG_PROFILE to any URL on your local Drupal site. The page will load normally, but Xdebug will create a cachegrind.out file in the /tmp folder.
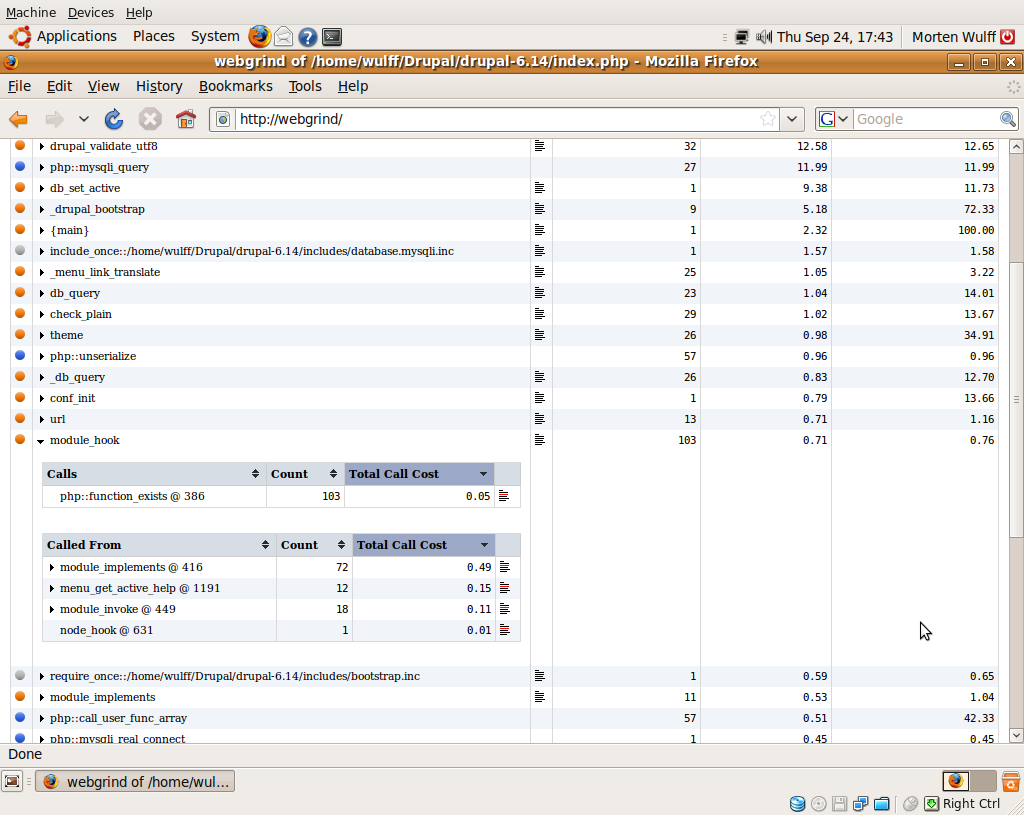
When the cachegrind file has been written you can go to http://webgrind/ to start analyzing it. In the Webgrind window, you can either just press Update to analyze the latest cachegrind file or select a specific file from the dropdown.
TODO: Description of the Webgrind interface.